Workspaces
| Operation | Minimum Access Permission | Remarks |
| Connection validate | Read | - |
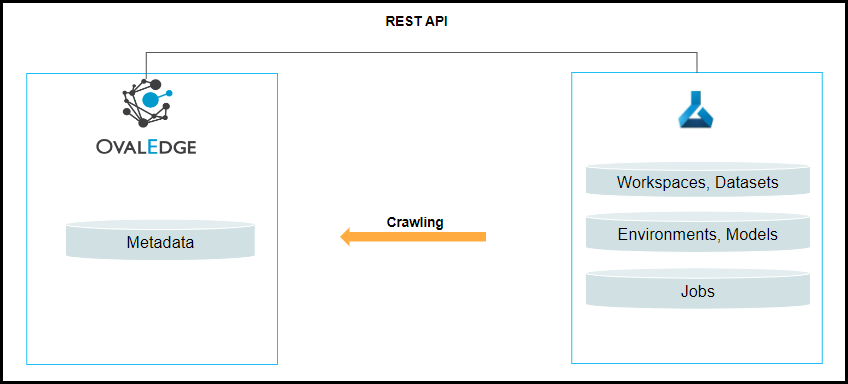
| Crawl Metadata | Read | Need REST API permissions and need data scientist role for the account to crawl the metadata from REST APIs. |
| Crawl Codes | Read | Need REST API permissions and need data scientist role for the account to crawl the metadata from REST APIs. |
| Field Name | Description |
| Connector Type | By default, the selected connection type is displayed as the AzureML. If required, the drop-down list allows the user to change the connector type and based on the selection of the connection type, the fields associated with the selected connection type are displayed. |
| Connector Name* | Select a connection name for Azure Machine Learning. You can specify a connection name to identify the Azure Machine Learning connection in OvalEdge. Example: AzureML_test |
| Credential Manager* | The purpose of a credential manager is to enhance the security that stores the API keys, passwords, certificates, and other sensitive data securely and helps to manage access, rotates, and audit secrets. OE Credential Manager: Azure Machine Learning connection is configured with the basic Username and Password of the service account in real-time when OvalEdge establishes a connection to the Azure Machine Learning database. Users need to add the credentials manually if the OE Credential Manager option is selected. HashiCorp: The credentials are stored in the HashiCorp database server and fetched from HashiCorp to OvalEdge. AWS Secrets Manager: The credentials are stored in the AWS Secrets Manager database server and fetched from the AWS Secrets Manager to OvalEdge. Azure Key Vault: Azure Key Vault allows for secure storage and strict access mechanisms of sensitive information such as tokens, passwords, certificates, API keys, and other confidential data. Click here for more information. For more information on Credential Manager, refer to Credential Manager. |
| License Add-Ons | All the connectors will have a Base Connector License by default that allows you to crawl and profile to obtain the metadata and statistical information from a data source. |
| Credential Manager ConnId | When you have more than one Credential Manager ID, pick the specific ID you want in the Credential Manager ConnId field. |
| Client Id* | After registering your application, you'll see the application ID (or client ID) under
|
| Connector Environment | The environment drop-down list allows you to select the environment configured for the connector from the drop-down list. For example, PROD, or STG (based on the configured items in the OvalEdge configuration for the connector.environment). The purpose of the environment field is to help you identify which connector is connecting what type of system environment (Production, STG, or QA). Note: The steps to set up environment variables are explained in the prerequisite section. |
| Client Secret* | The application needs a client secret to prove its identity when requesting a token. For security reasons, Microsoft limits the creation of client secrets longer than 24 months and strongly recommends that you set this to a value less than 12 months.
|
| Tenant Id* | The tenant ID identifies the Microsoft Entra ID (previously, Azure AD) tenant to use for authentication. It is also referred to as the directory ID
|
| Subscriber Id* | The subscription ID is a GUID that uniquely identifies your subscription to use Azure services.
|
| Resource Group Name* | Select the resource group based on the need. |
| API Version* | Currently supporting 2018-11-19 |
| Default Governance Roles* | Users can select a specific user or a team from the governance roles (Steward, Custodian, Owner) that get assigned for managing the data asset. Note: The drop-down list displays all the configurable roles (single user or a team) as per the configurations made in the OvalEdge Security | Governance Roles section. |
| Admin Roles* | Select the required admin roles for this connector.
|
| Select Bridge* | A solution is required to circumnavigate the customer firewall when OvalEdge is deployed as a SaaS application. That solution is OvalEdge Bridge. A bridge is a type of firewall that operates at the network layer.
For more information, refer to Bridge Overview |