> For the complete documentation index, see [llms.txt](https://docs.ovaledge.com/llms.txt). Markdown versions of documentation pages are available by appending `.md` to page URLs; this page is available as [Markdown](https://docs.ovaledge.com/release8.1/installation-and-settings/authentication-and-sso-setup/keycloak.md).
# Keycloak
This article provides a detailed guide to integrate the OvalEdge application with **Keycloak** using **SAML-based Single Sign-On (SSO)**. Keycloak acts as the centralized Identity Provider (IdP) for managing user authentication and authorization. While Keycloak handles authentication, OvalEdge continues to manage application-level permissions and role mappings internally.
### Purpose
The objectives of this integration are to:
* Enable secure SSO authentication for OvalEdge users through Keycloak.
* Implement centralized access control using Keycloak IdP configurations.
* Streamline user and group management via Keycloak realms, clients, roles, and groups.
* Enhance security by externalizing authentication and minimizing credential management within OvalEdge.
### Process Overview
This guide covers the following steps:
* Create and configure a new Keycloak realm for OvalEdge.
* Register OvalEdge as a **SAML client** in Keycloak.
* Configure client scopes and mappers to pass user attributes in SAML assertions.
* Create users, roles, and groups in Keycloak.
* Configure the OvalEdge application with Keycloak SAML metadata.
* Restart Tomcat services and validate SSO login.
### Prerequisites
* Access to the **Keycloak Admin Console**.
* Administrator credentials for Keycloak.
* OvalEdge application URL.
* Access to the OvalEdge application server (VM).
* Access to Tomcat directory and environment configuration files.
## Step-by-Step Configuration
### Login to Keycloak
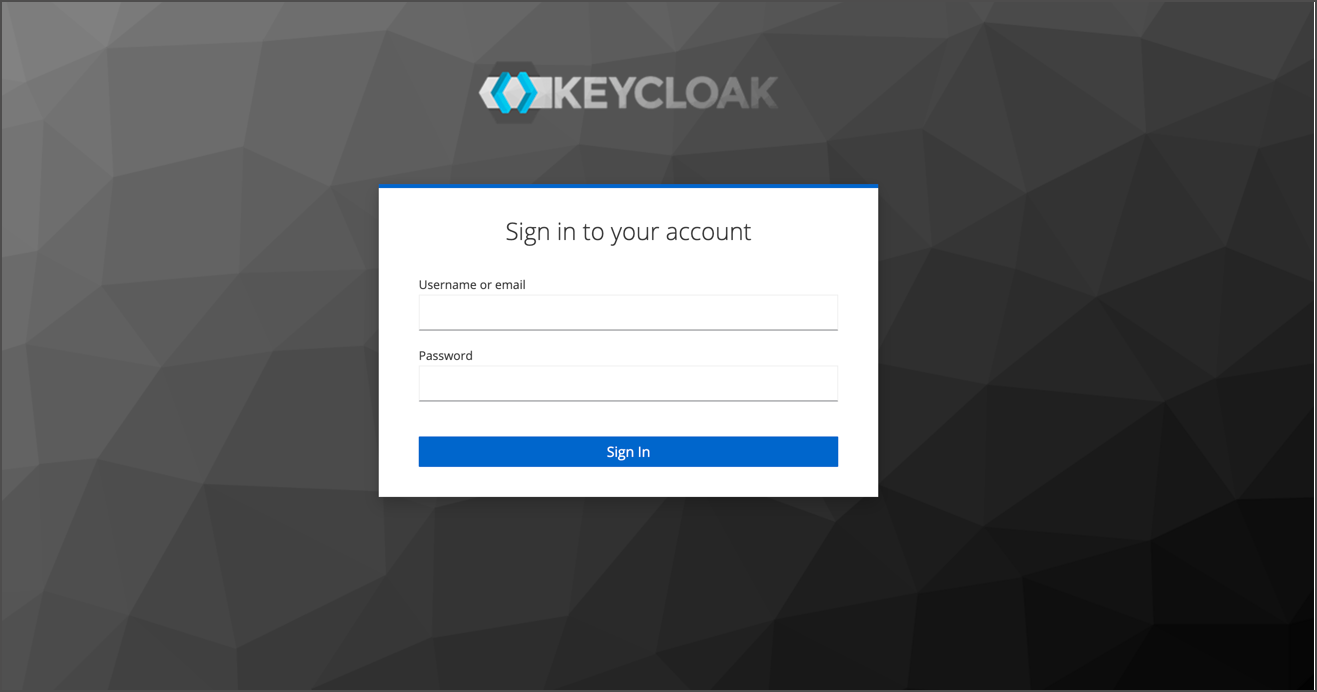
* Open the Keycloak Admin Console in a browser.
* Log in using administrator credentials.
### Create a Realm
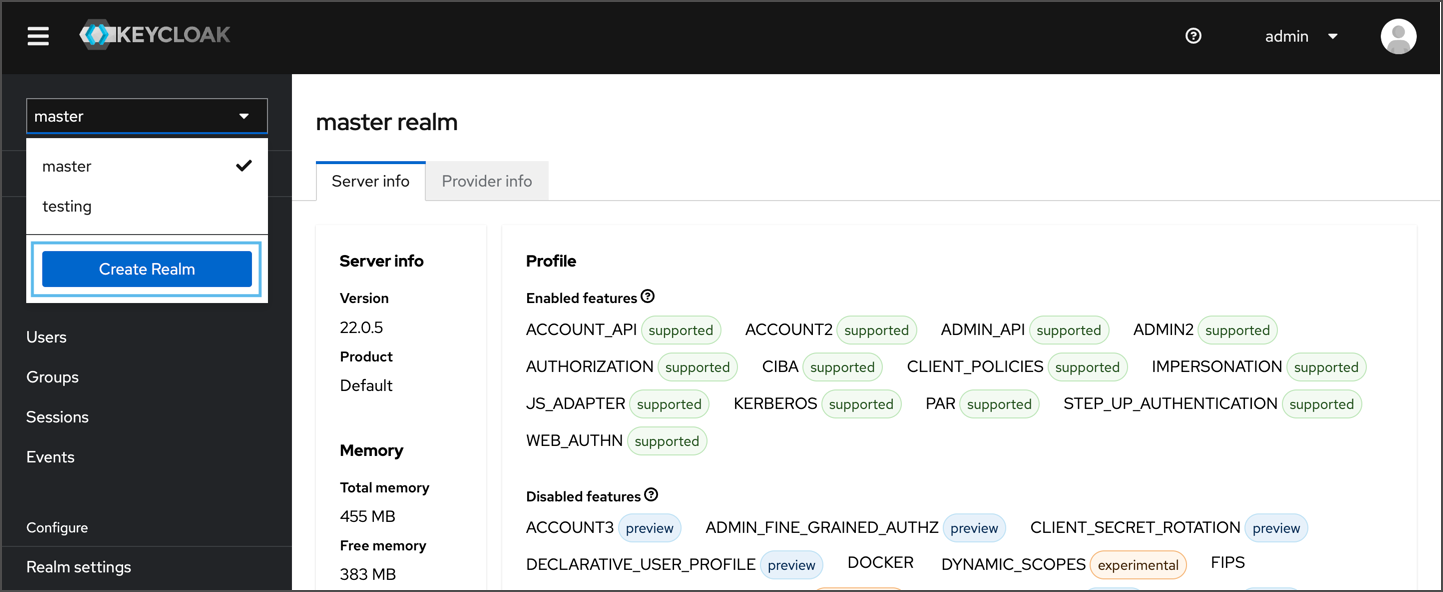
* In the Admin Console, click **Create Realm**.
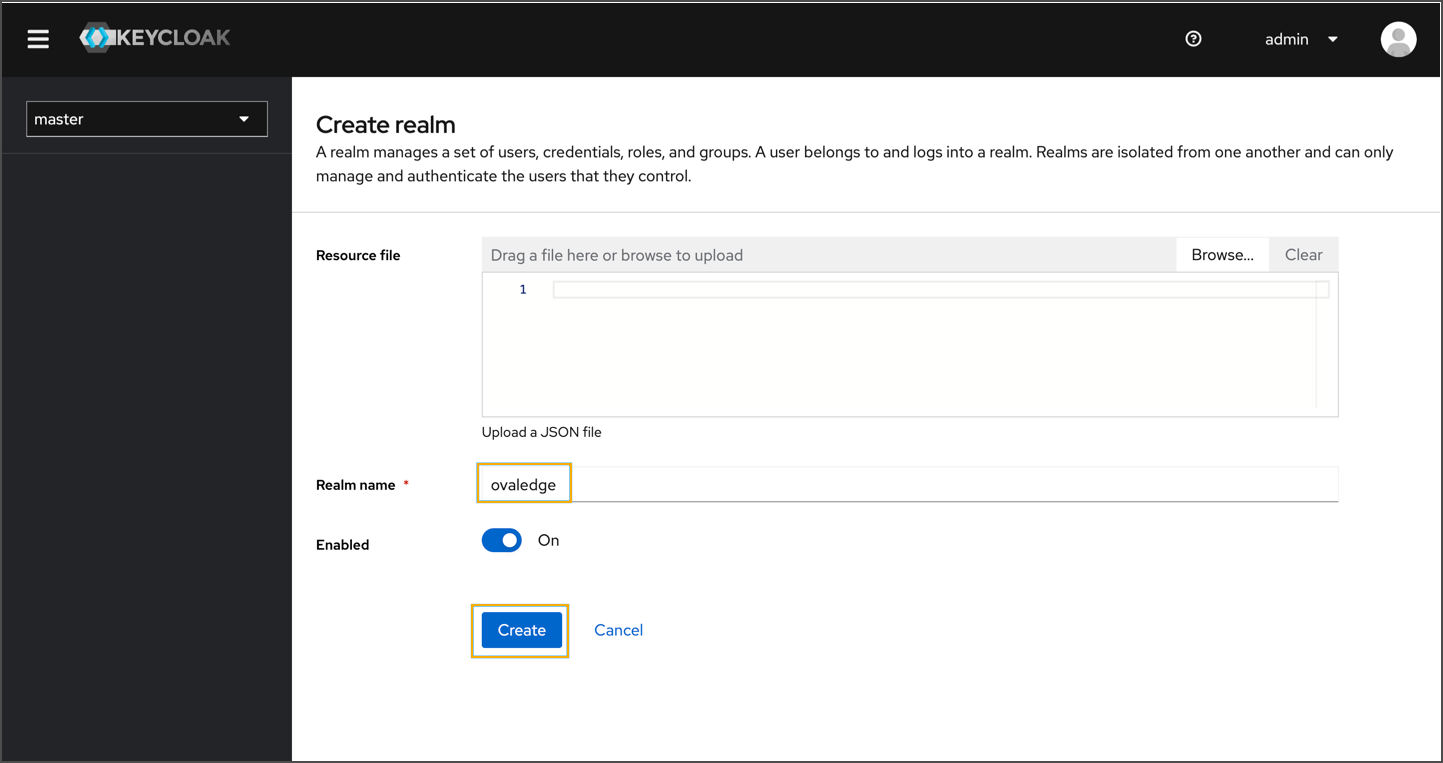
* Enter a realm name (e.g., `OvalEdgeRealm`).
* Click **Create**.
### Switch to the Realm
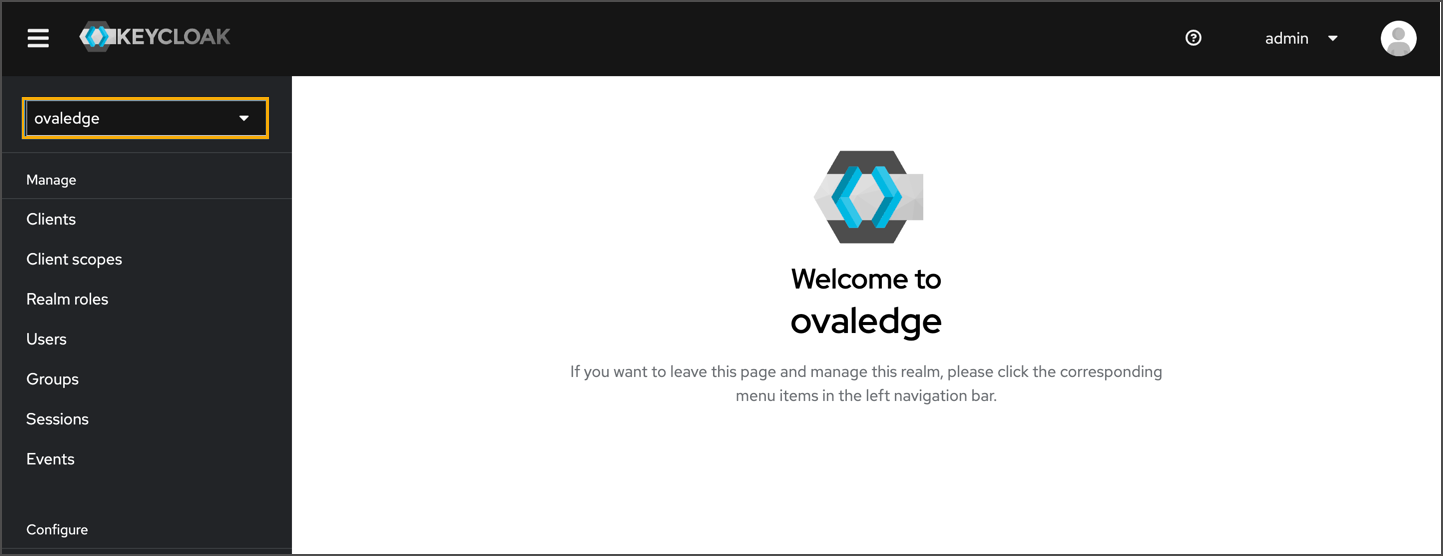
* Use the dropdown in the top-left corner to switch to the newly created realm.
### Create a Client
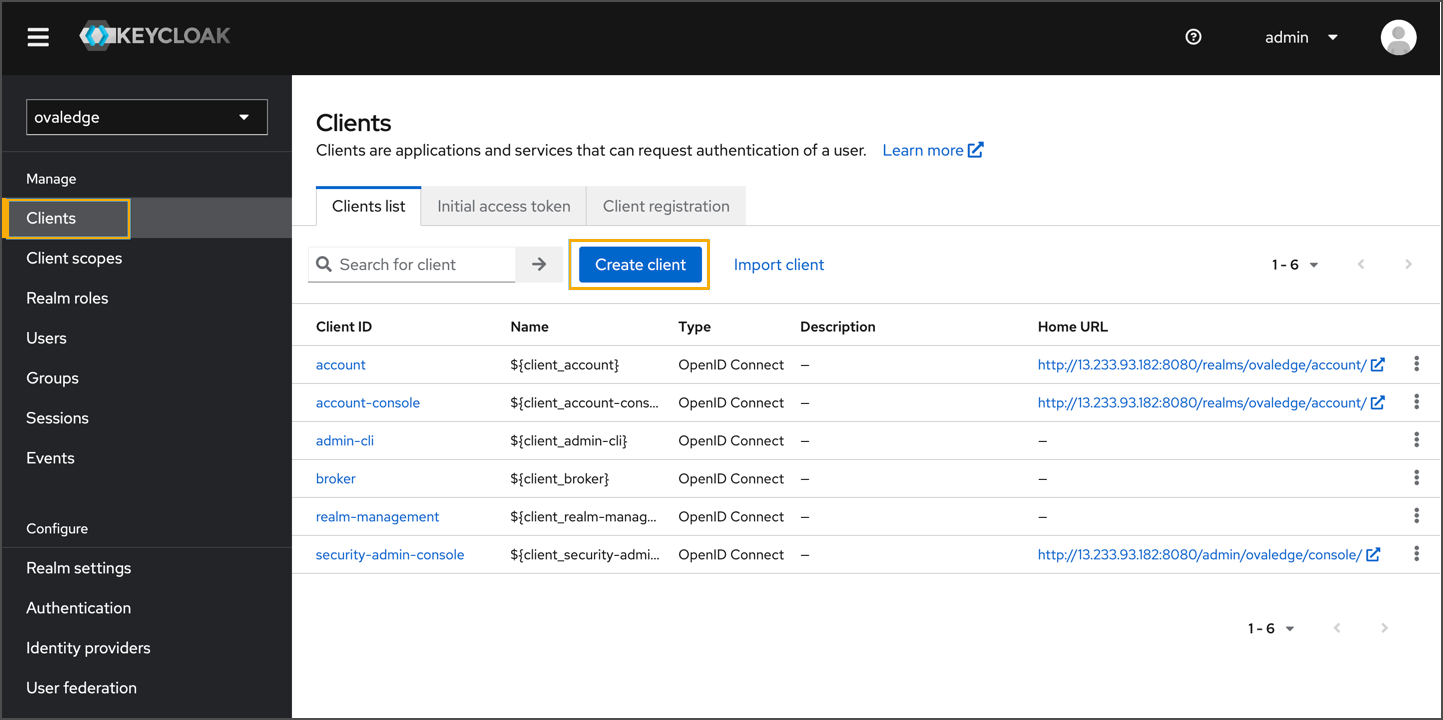
* In the left menu, navigate to **Clients** .
* **Create Client**.
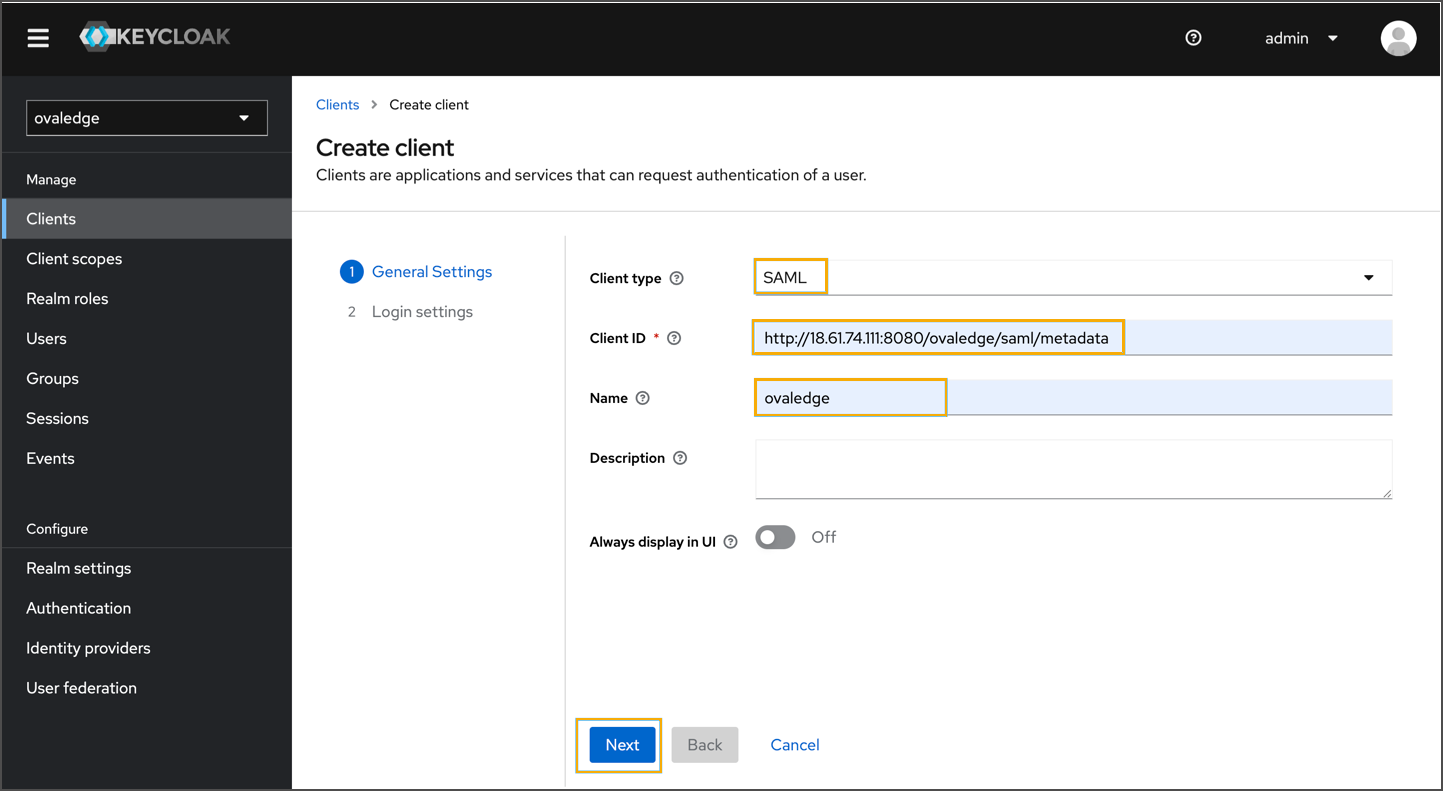
* Configure as follows:
* **Client Type:** SAML
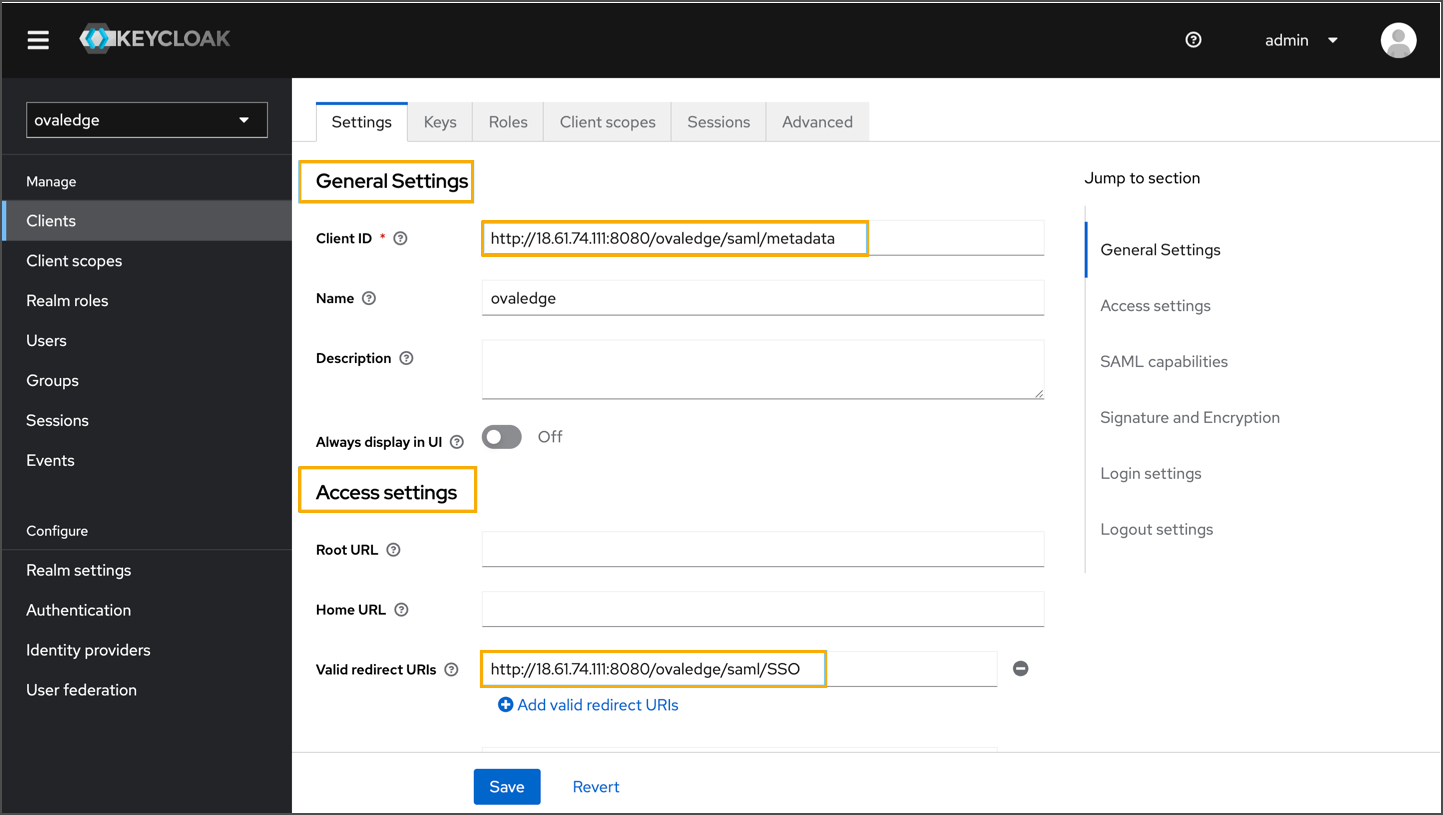
* **Client ID:** `http:///saml/metadata`
* **Name:** OvalEdgeSAMLClient
* Click **Next** → **Save**.
### Configure Client Settings
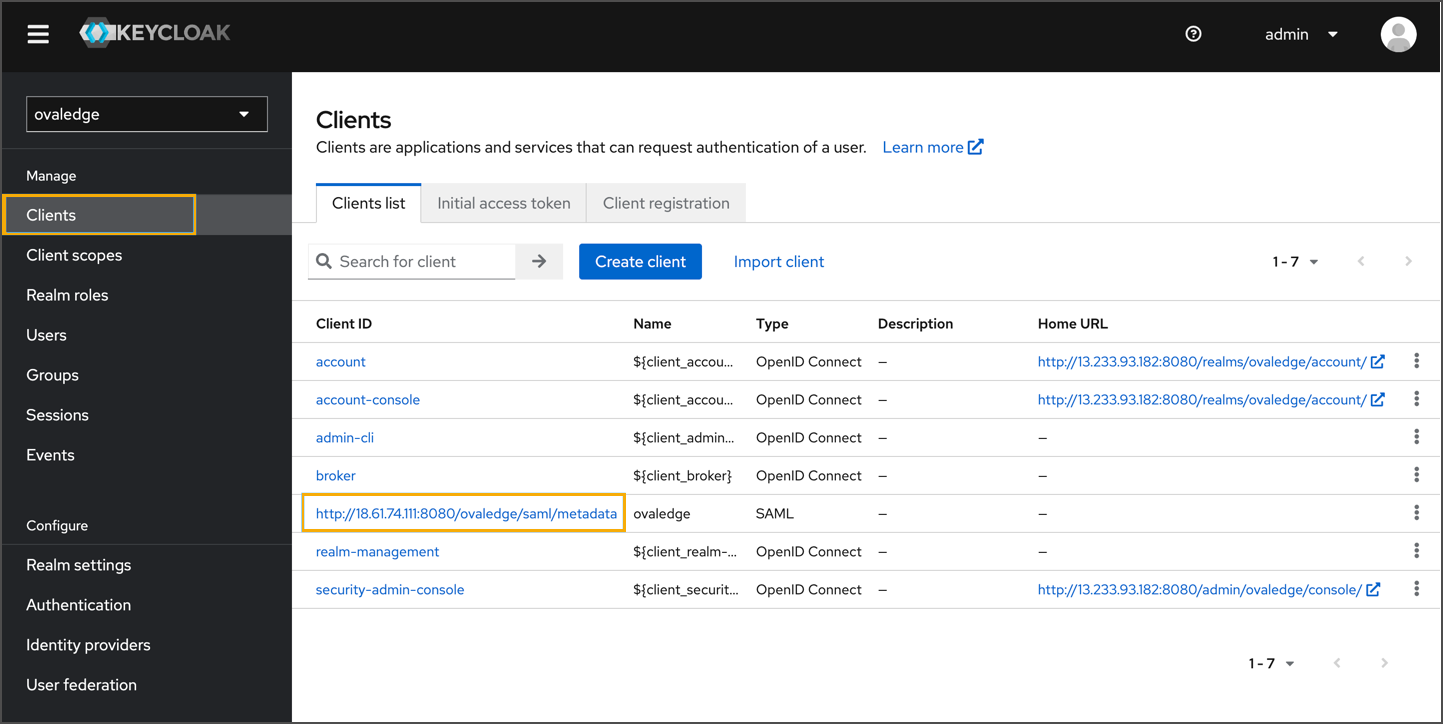
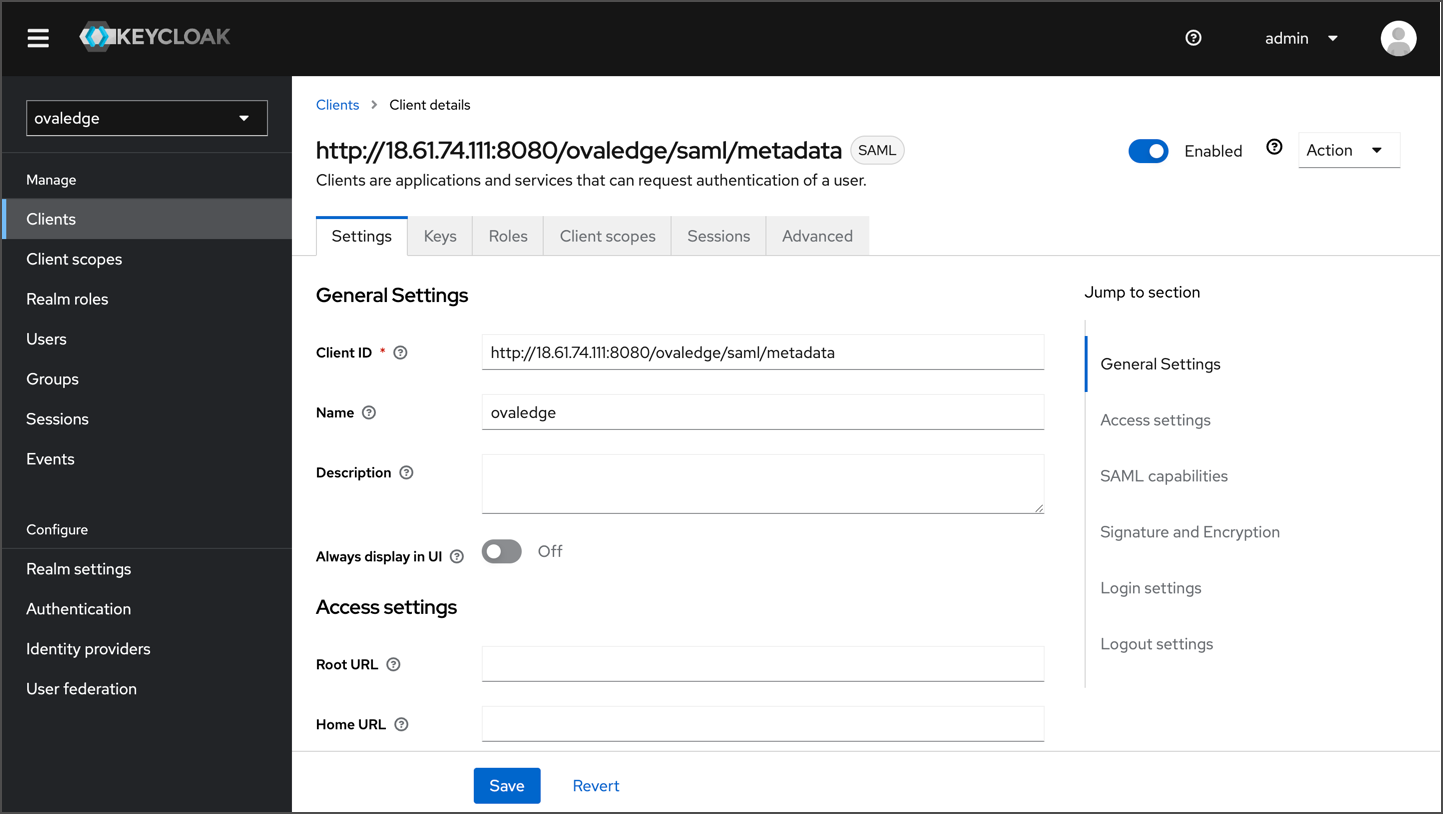
* Go to **Clients → select newly created \[Client ID]**.
* Under General Settings, keep the Client ID unchanged.
* Under **Access Settings,** set **Valid Redirect URI** to:
```
http:///ovaledge/saml/SSO
```
* Click **Save**.
### Configure Keys
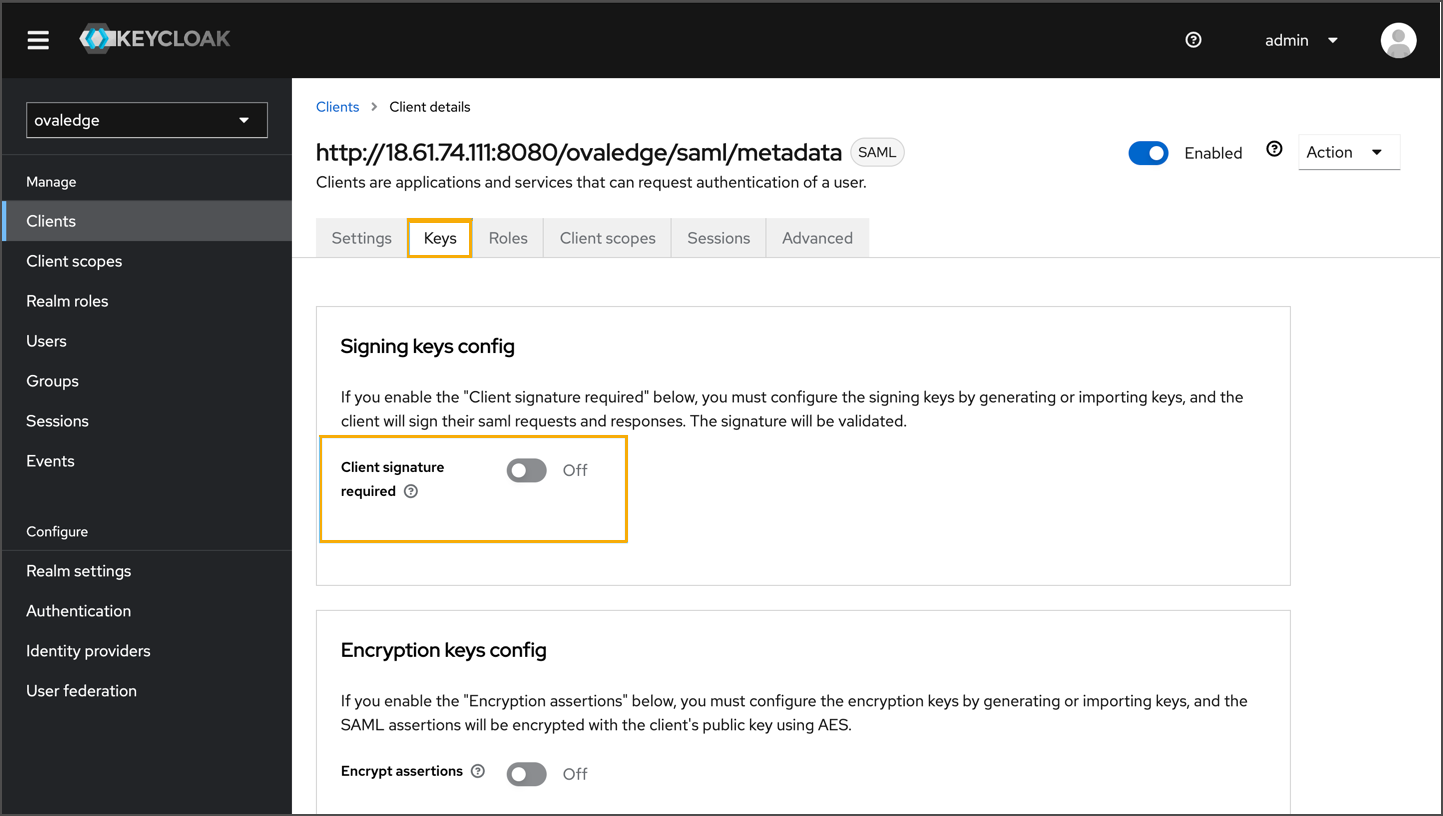
* Go to the **Keys** tab.
* Disable **Keys Signature Required**.
* Save changes if prompted.
### Create Roles
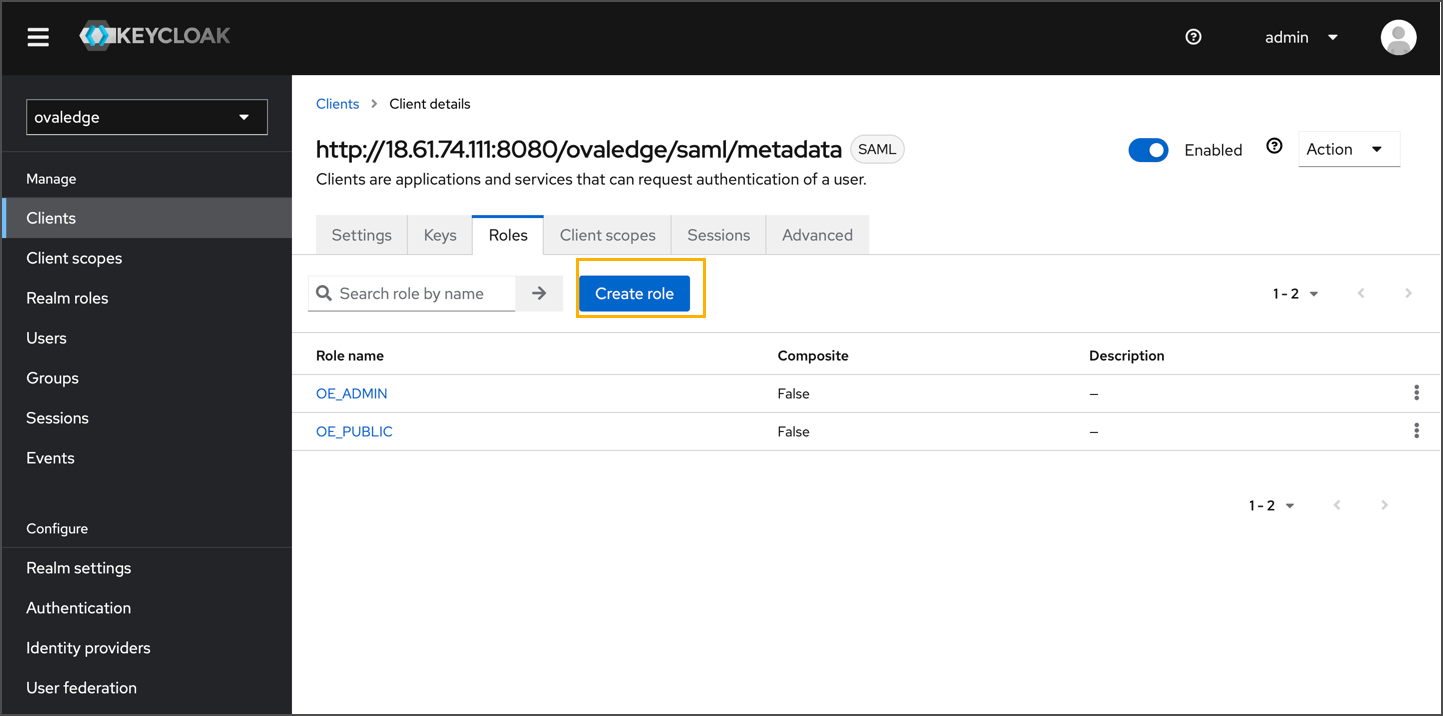
* Navigate to **Roles → Add Role**.
* Create the following roles:
* OE\_ADMIN
* OE\_PUBLIC
### Configure Client Scopes and Mappers
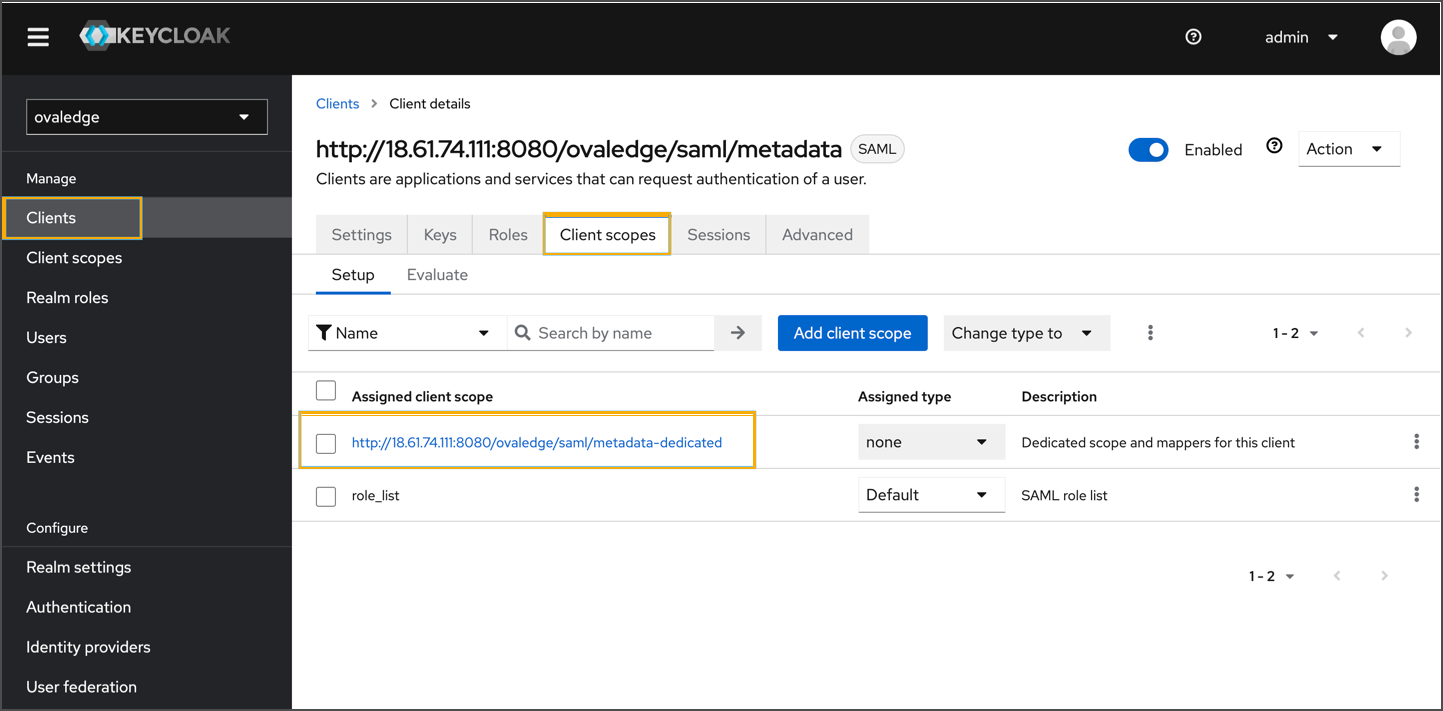
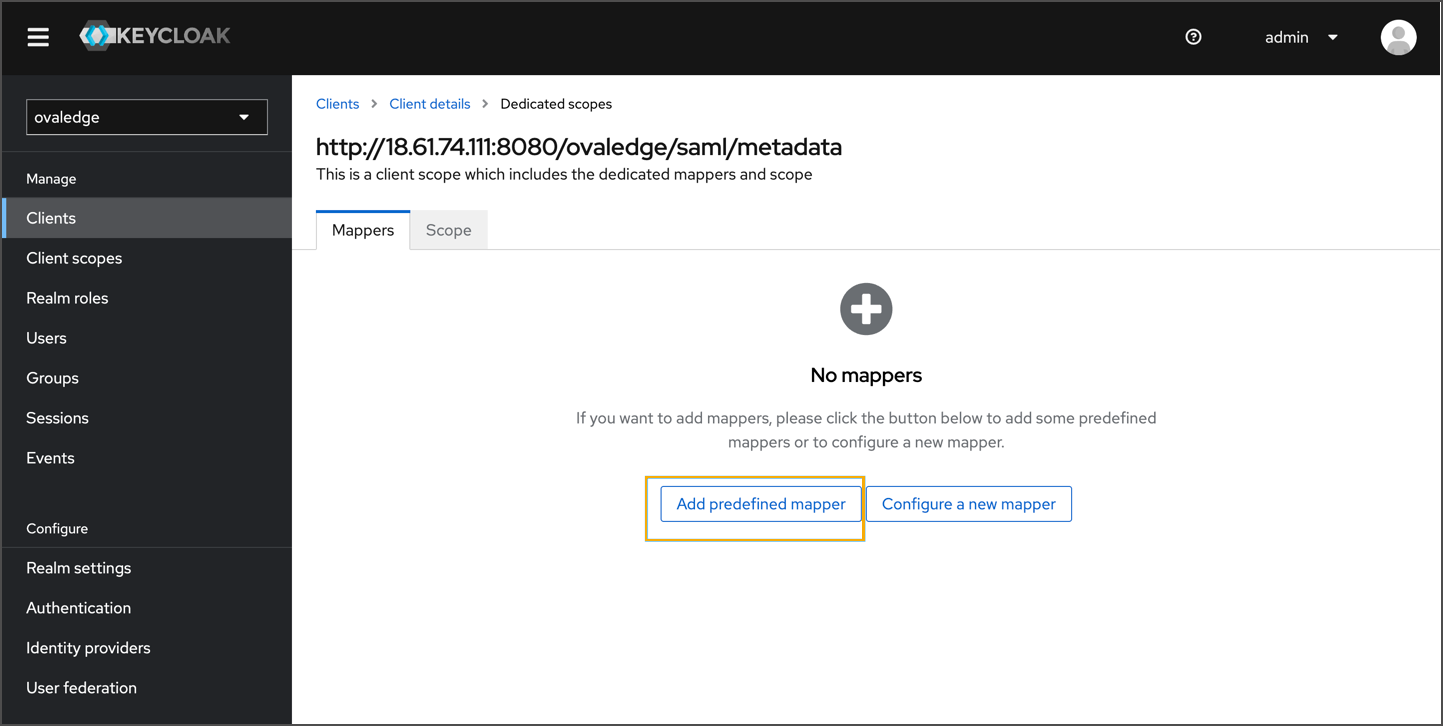
* Go to **Client Scopes → Assigned Client Scopes.**
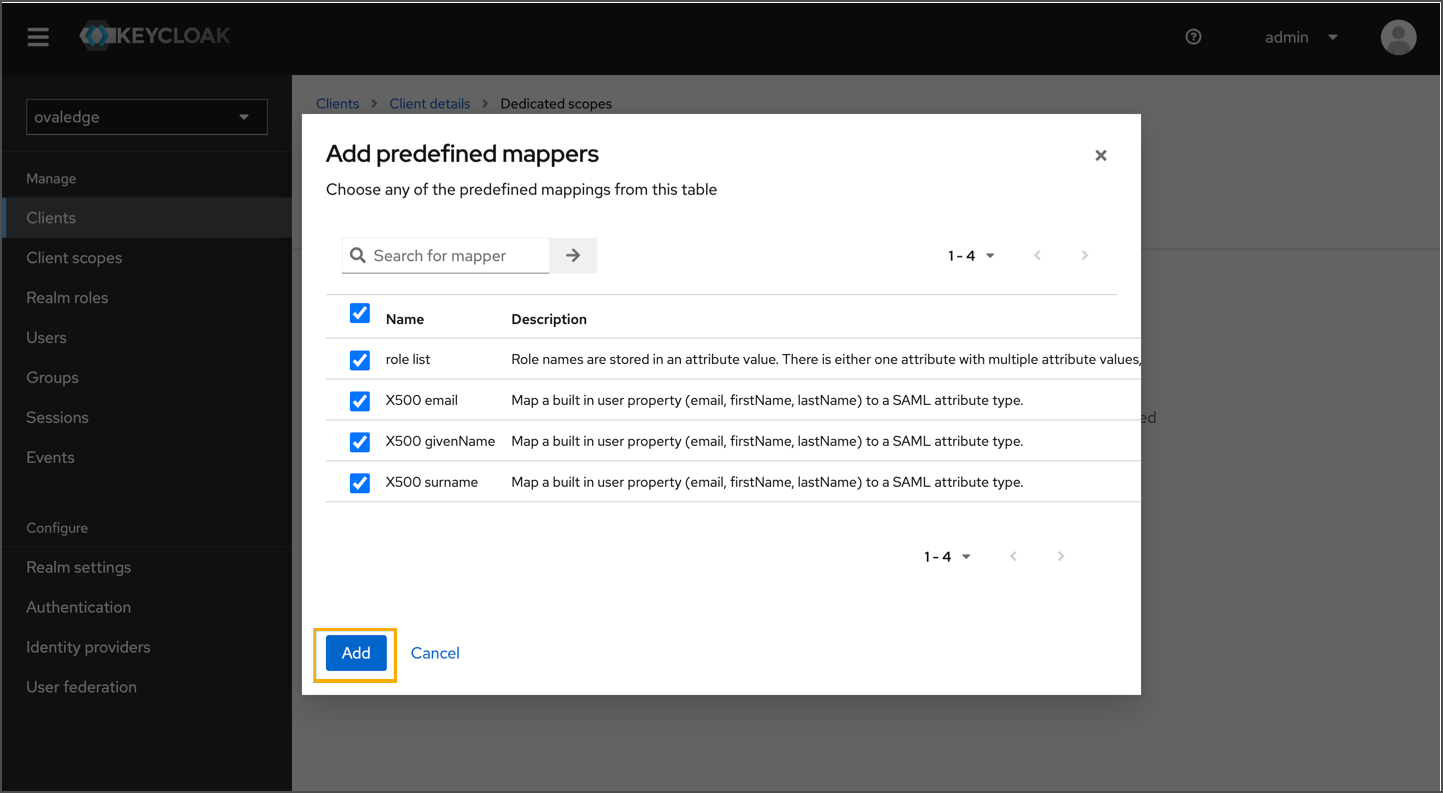
* **Click on Add predefined mapper**.
* Select and configure the following:
* X500 Username
* Role List
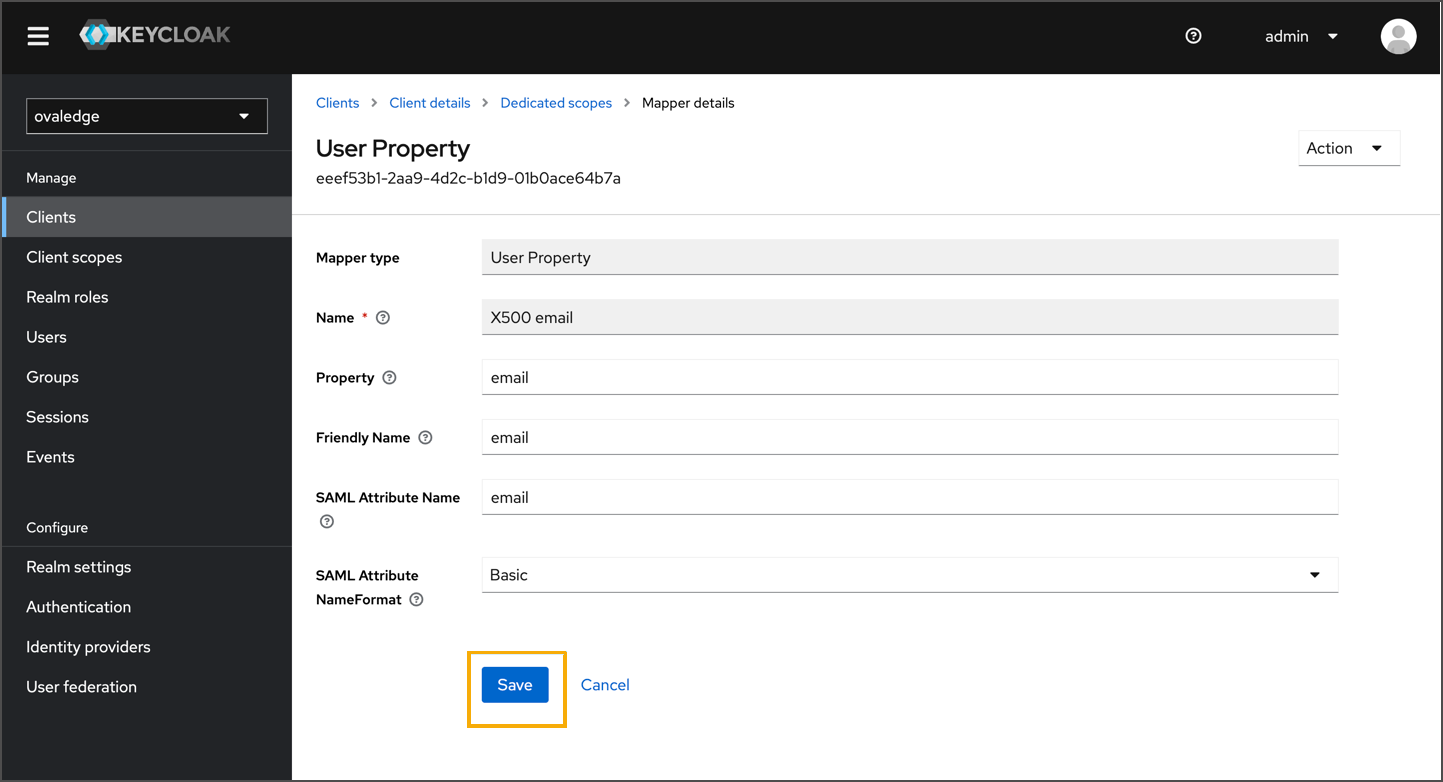
* X500 Email
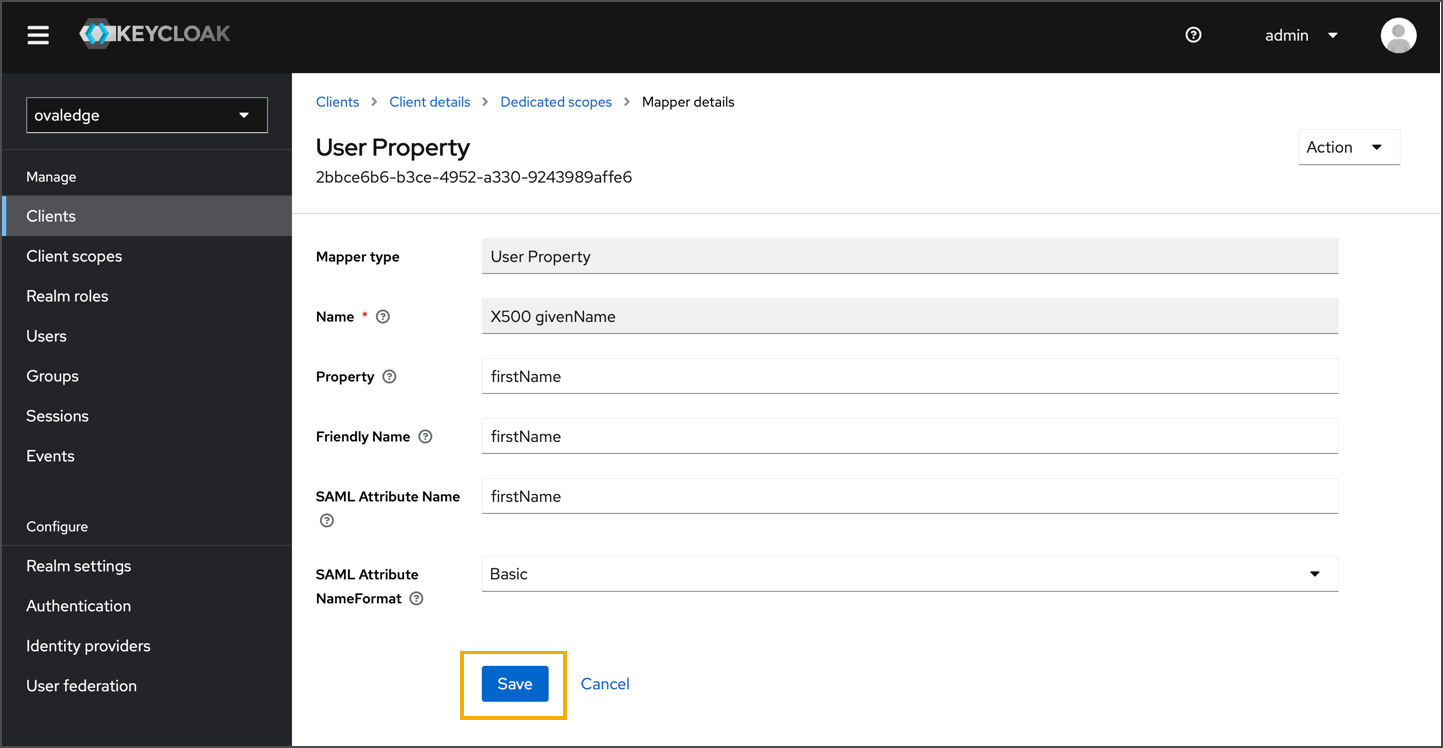
* X500 givenName
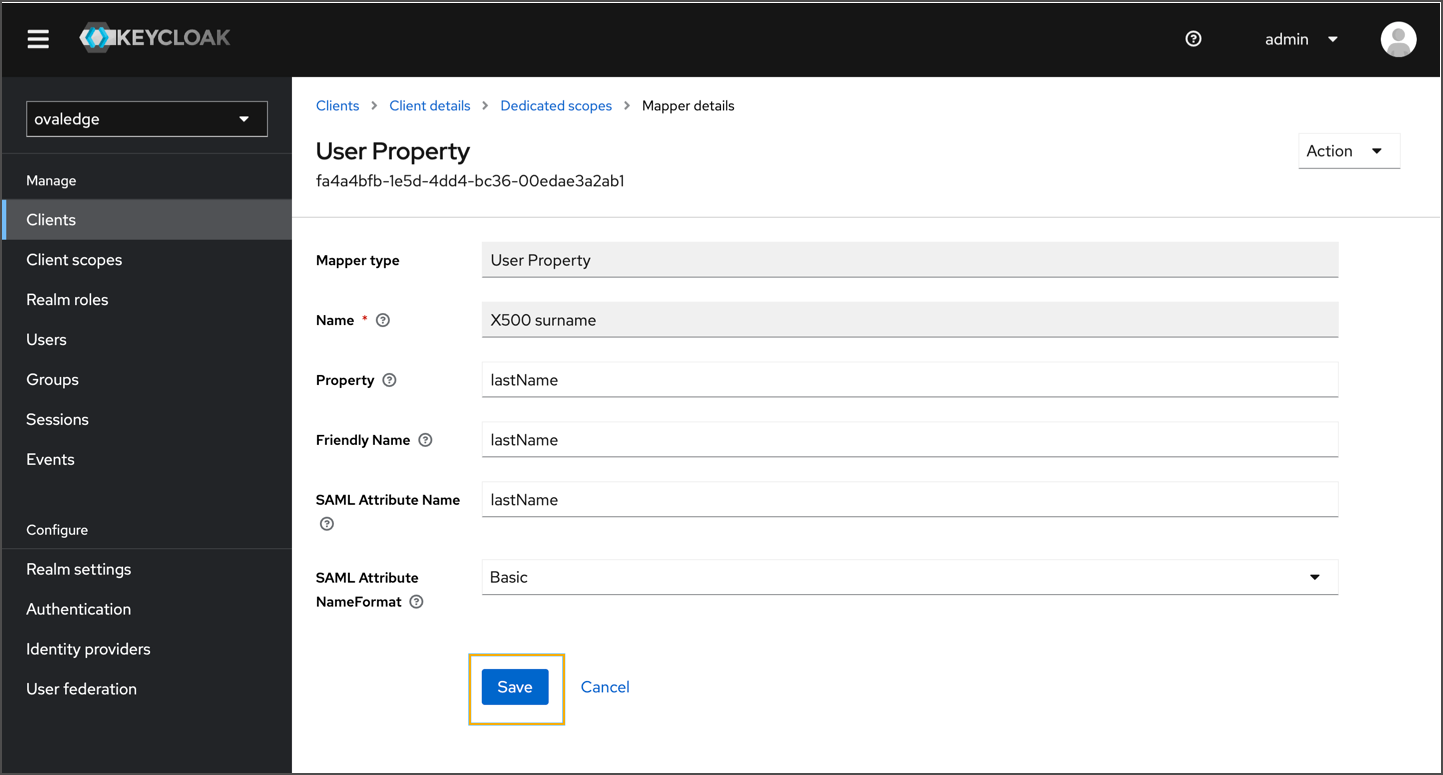
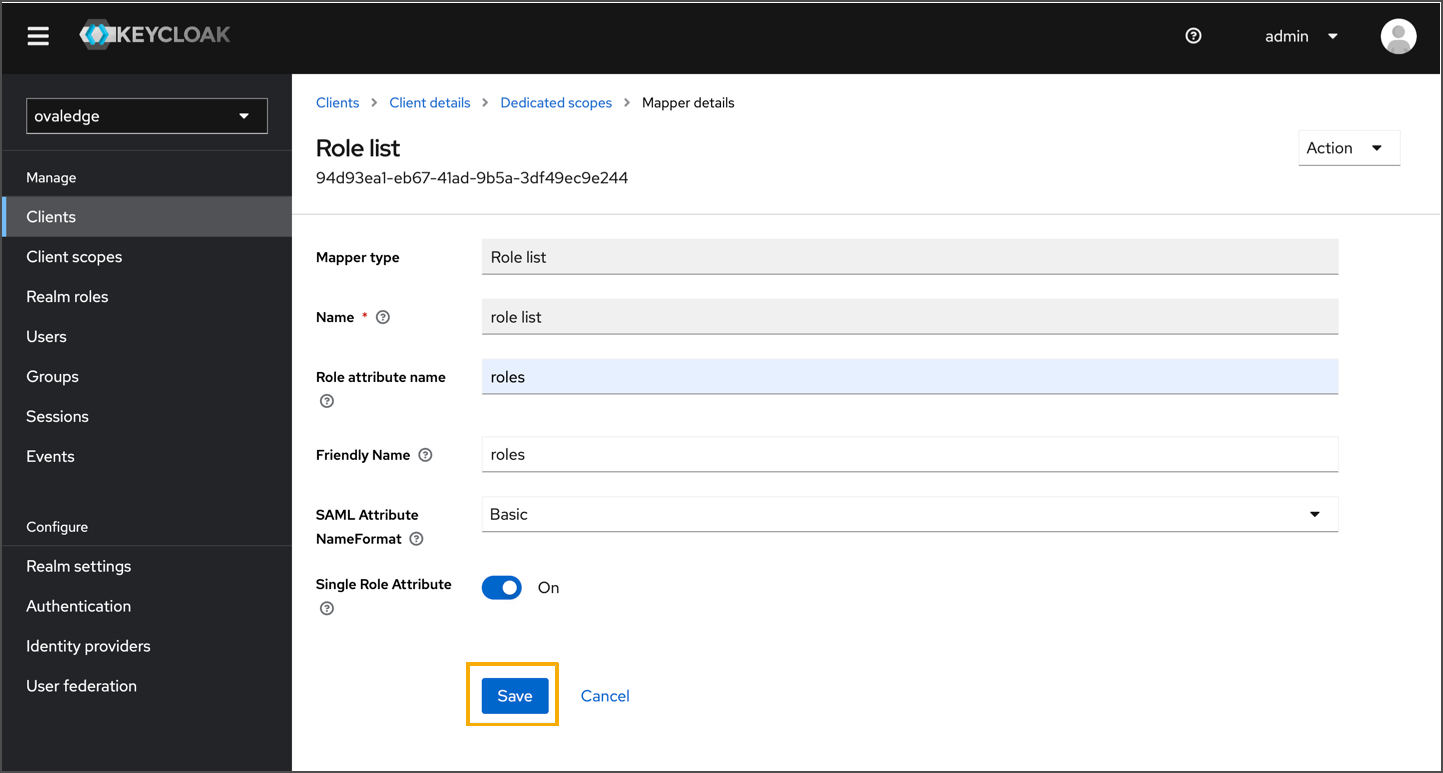
* Configure each mapper as per requirements (refer to UI screenshots for settings).
* X500 Username
* Role List
* X500 Email
* X500 givenName
### Configure Assertion Consumer URLs
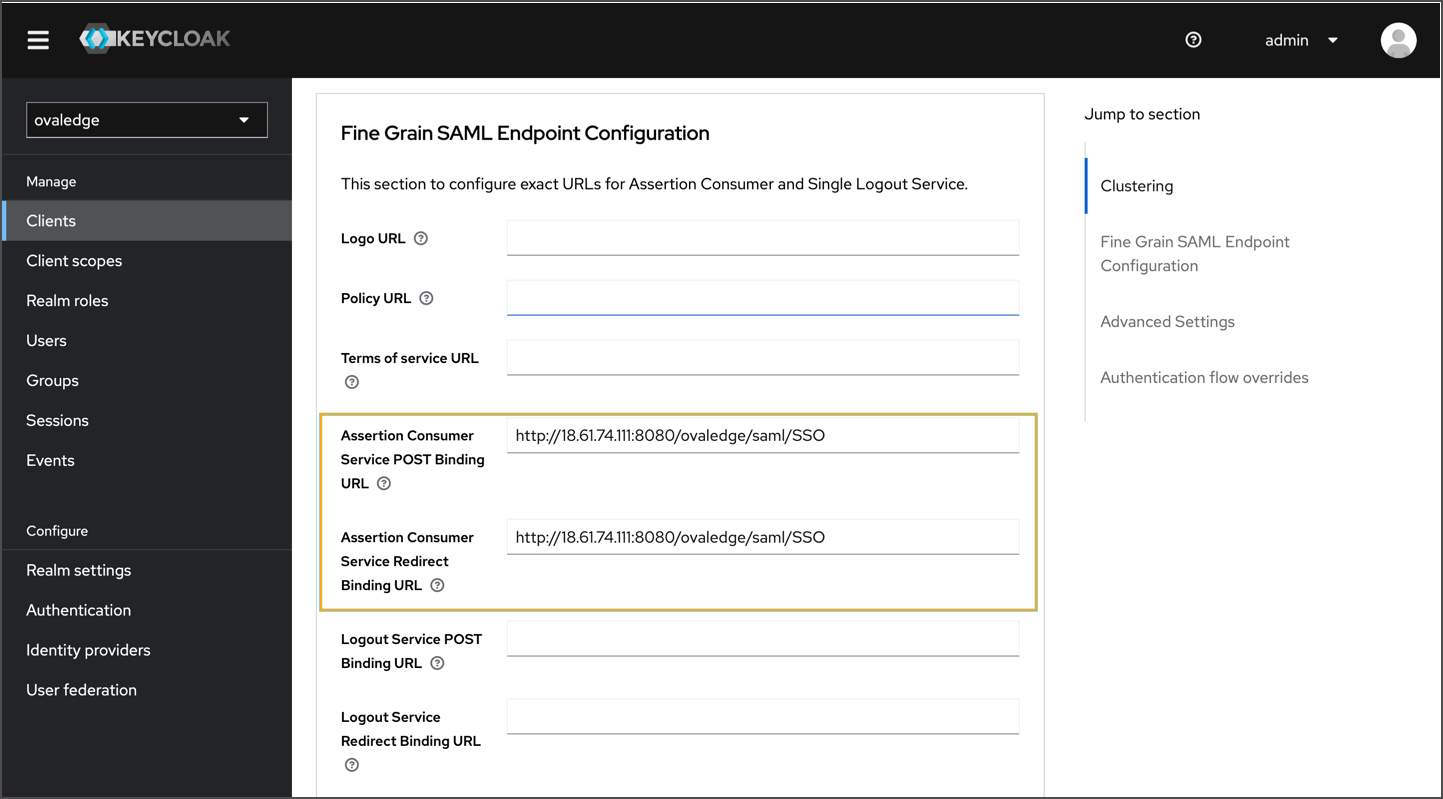
* Open the **Advanced** tab of the client configuration.
* Set URLs:
* **Assertion Consumer Service POST Binding:**
```
http://:8080/ovaledge/saml/SSO
```
* **Assertion Consumer Redirect Binding:**
```
http://:8080/ovaledge/saml/SSO
```
* Click **Save**.
### Create Users
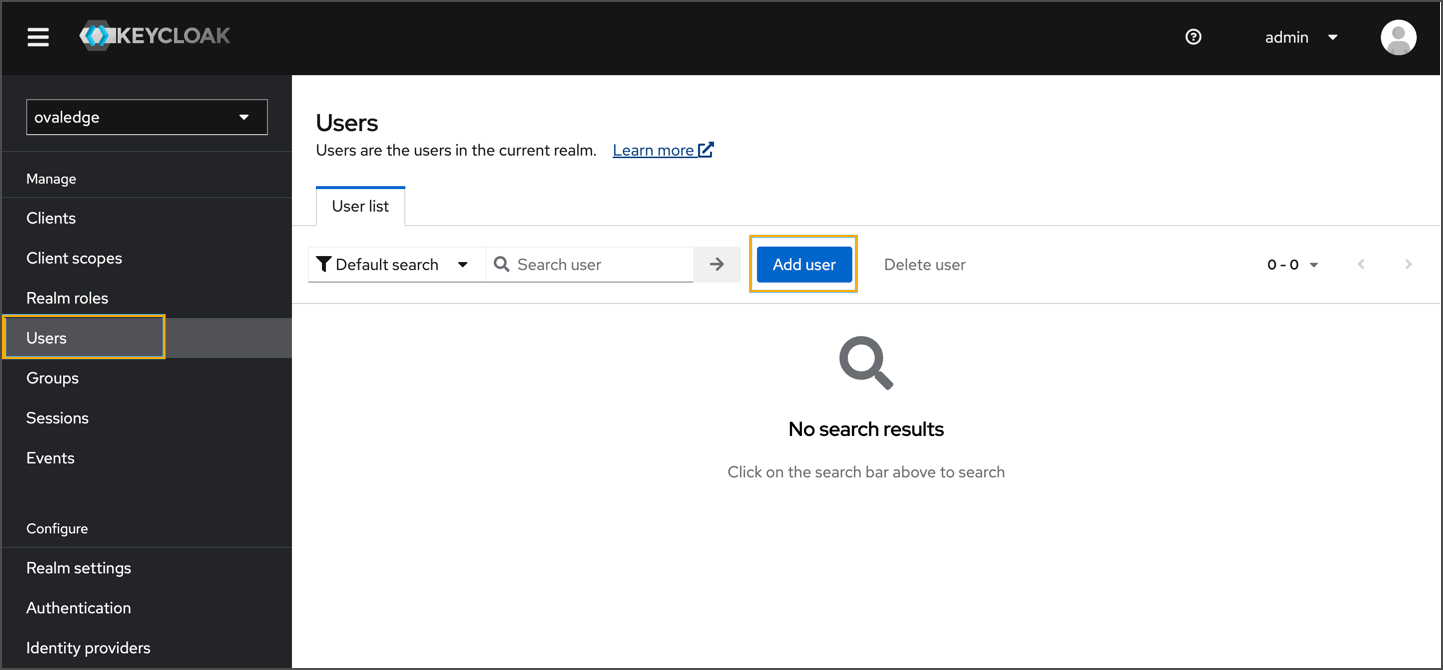
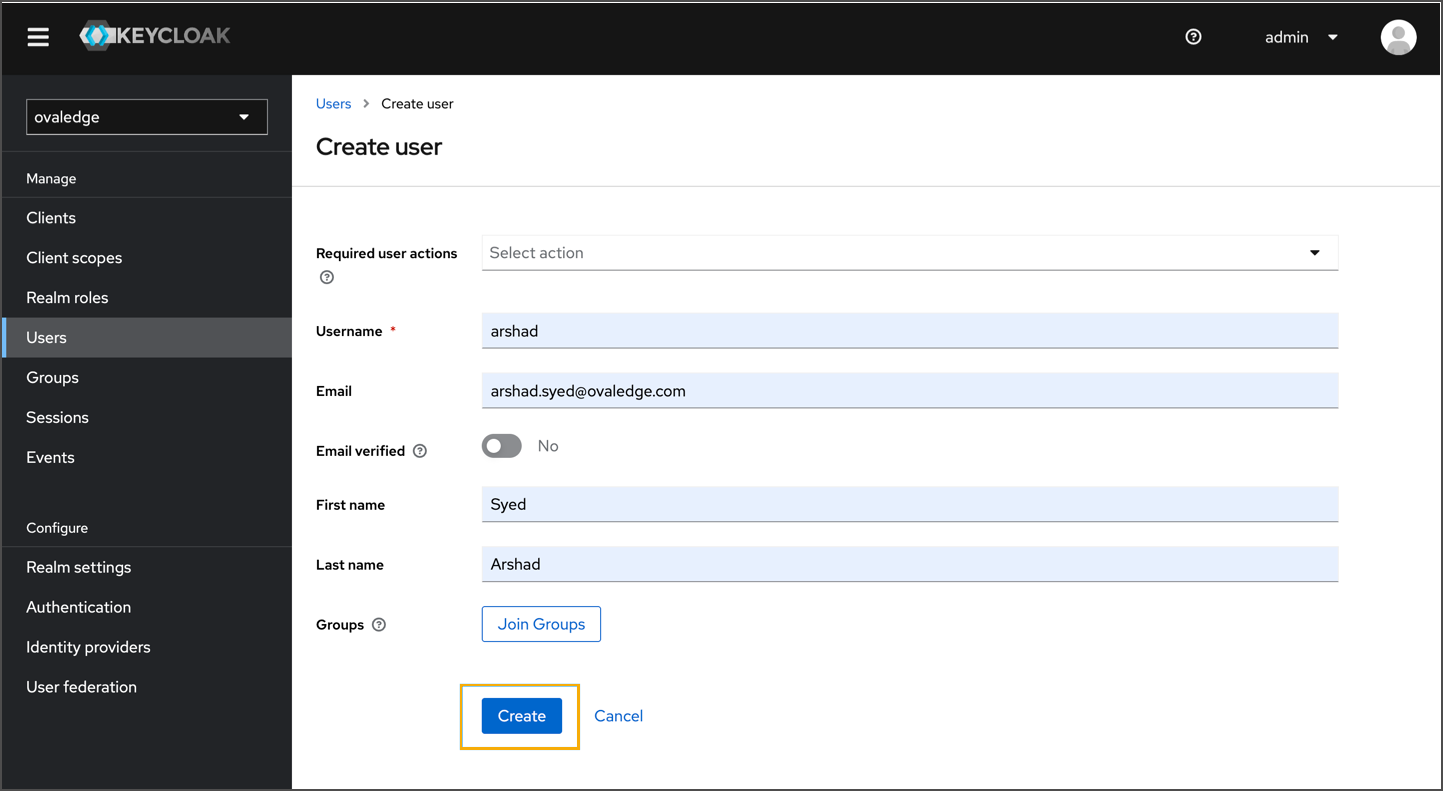
* Navigate to **Users → Add User**.
* Enter user details → **Create**.
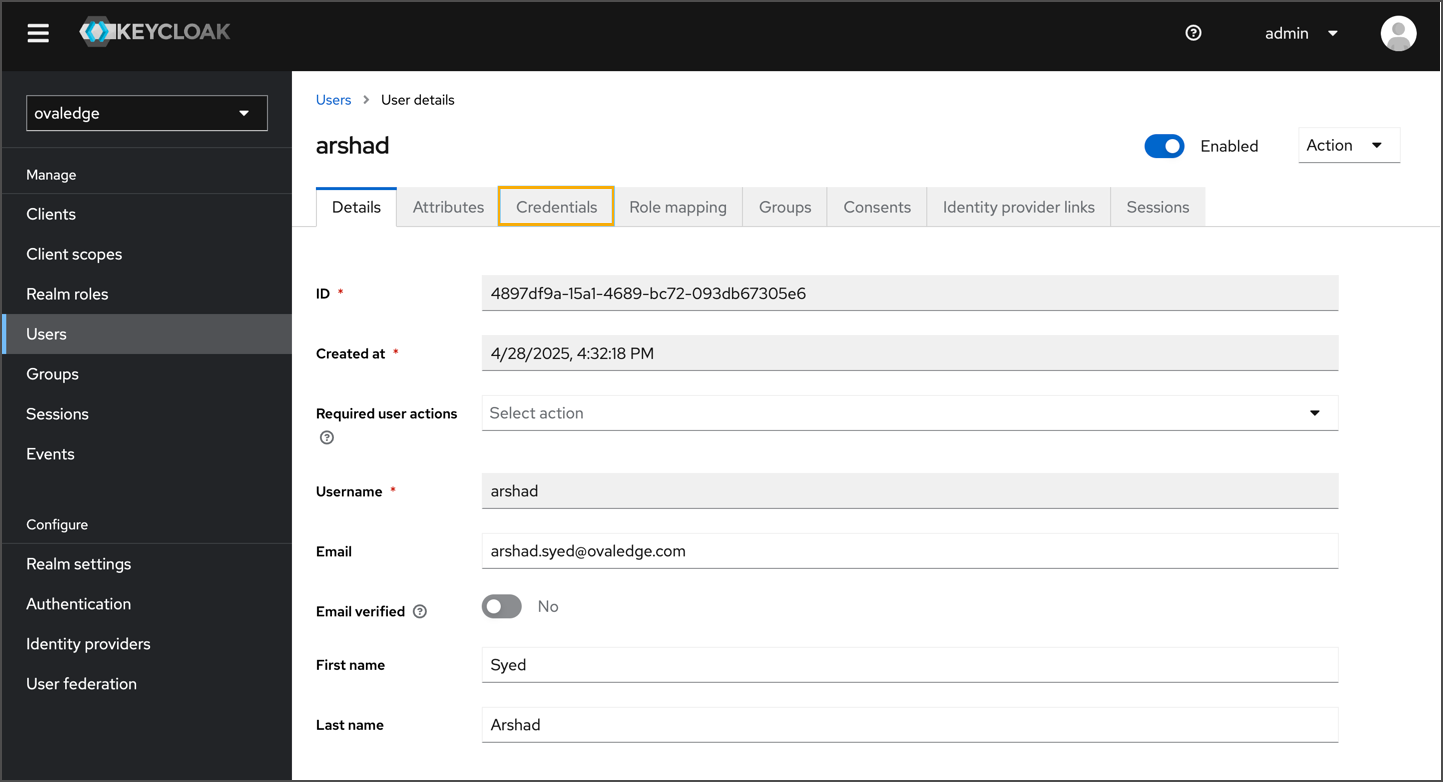
* **After creation:**
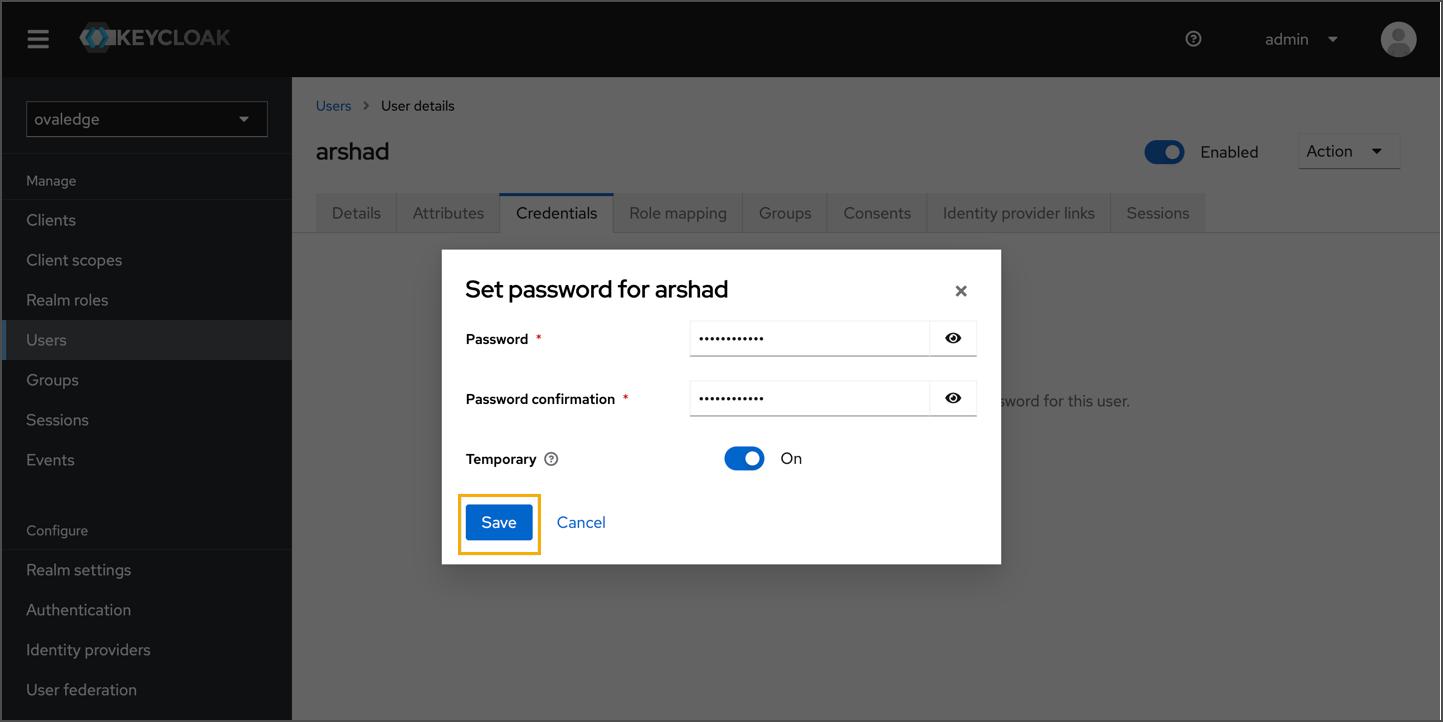
* Go to **Credentials** tab.
* Set and save a password.
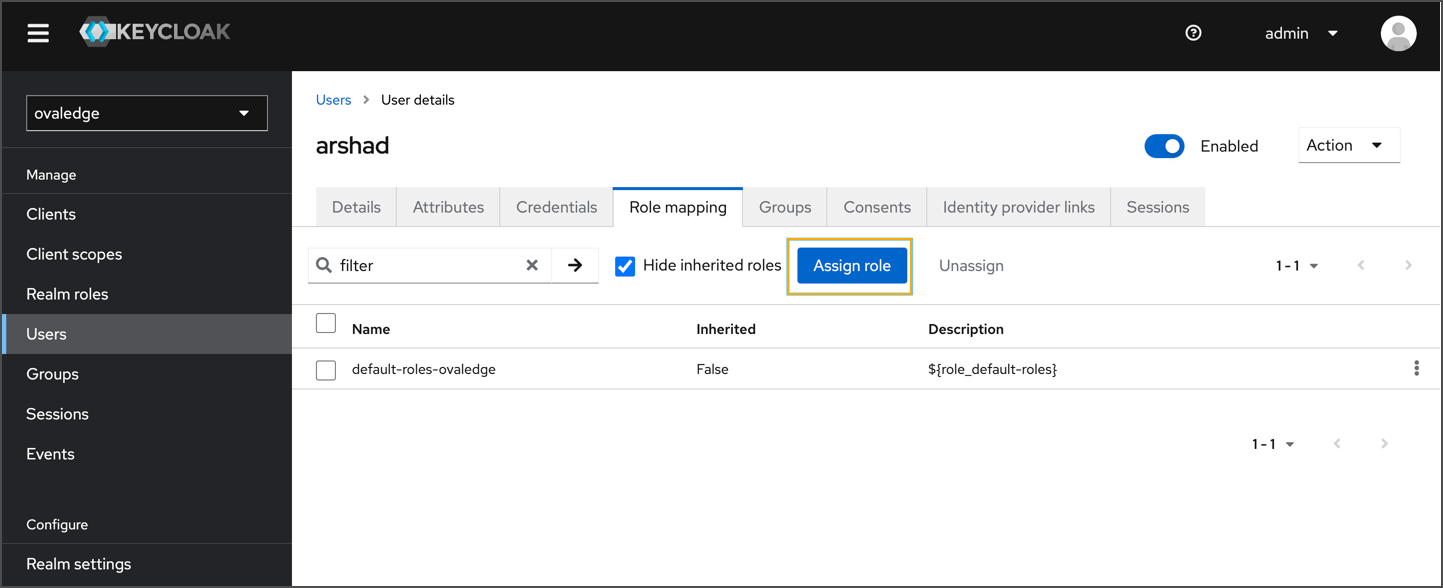
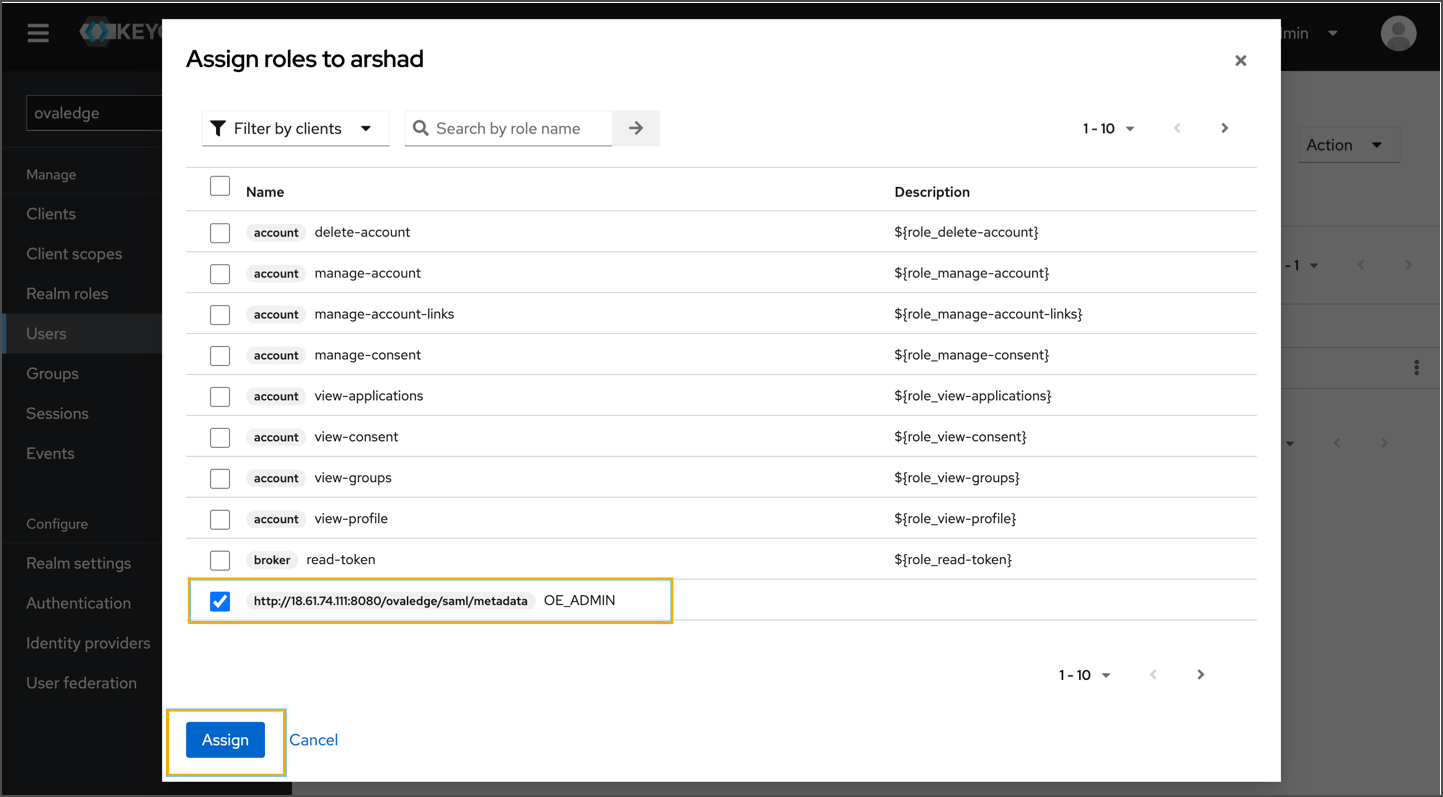
* Go to **Role Mappings** → Assign role.
* Assign the user to `OE_ADMIN` or `OE_PUBLIC` role.
### Create Groups
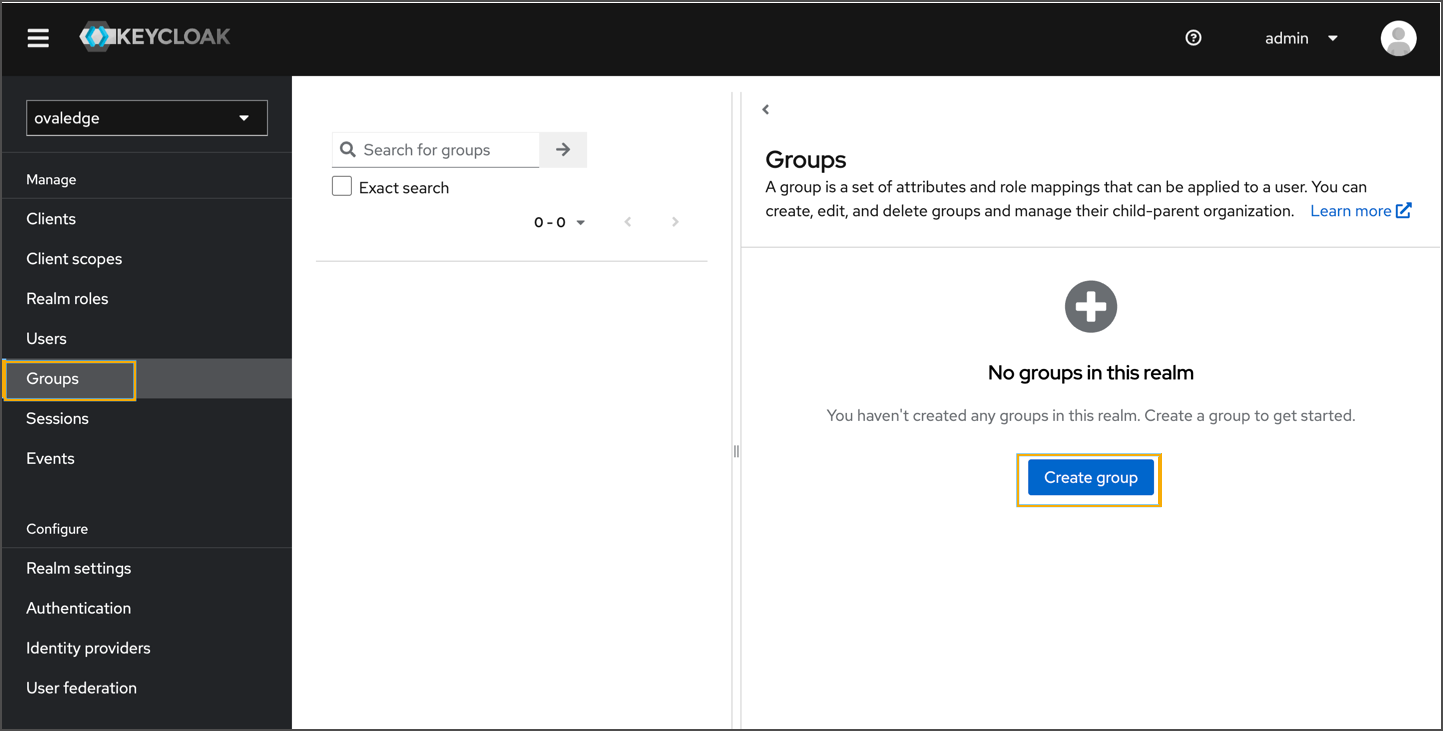
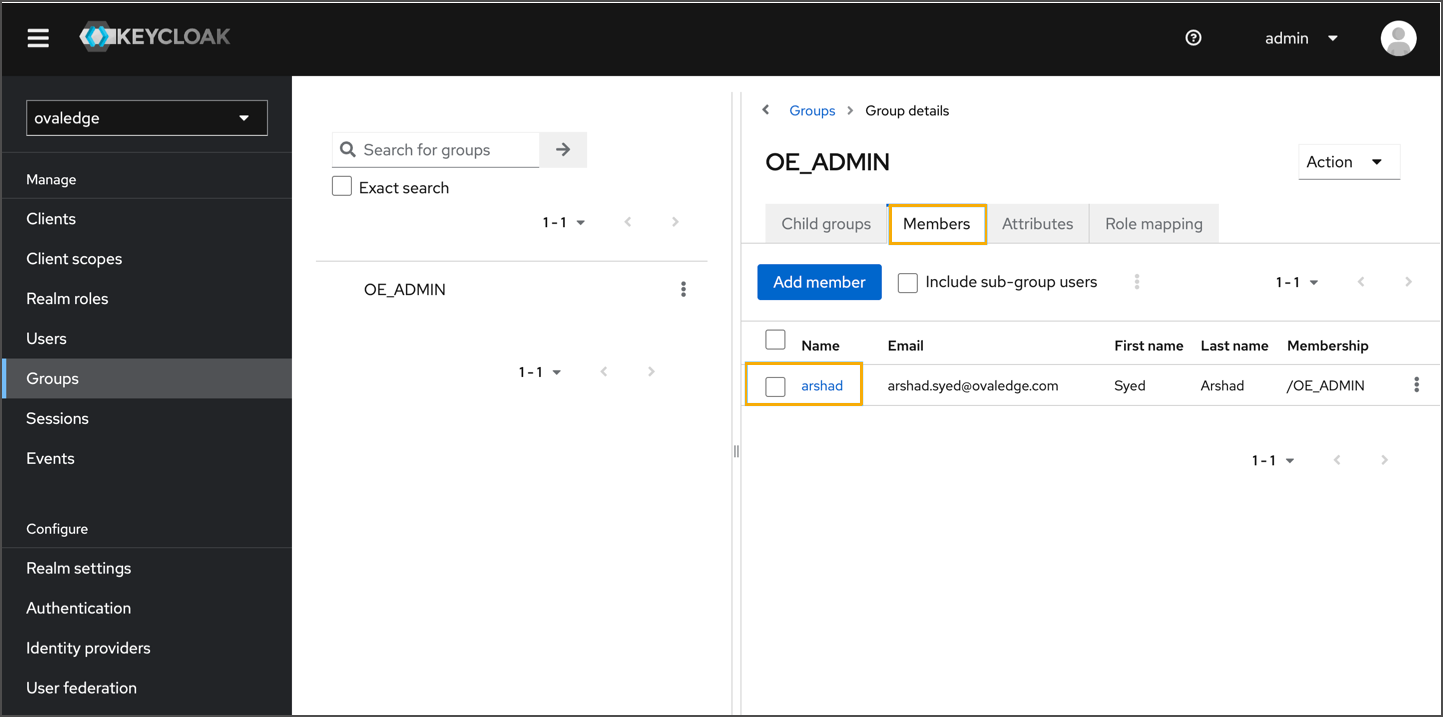
* Navigate to **Groups → Create Group**.
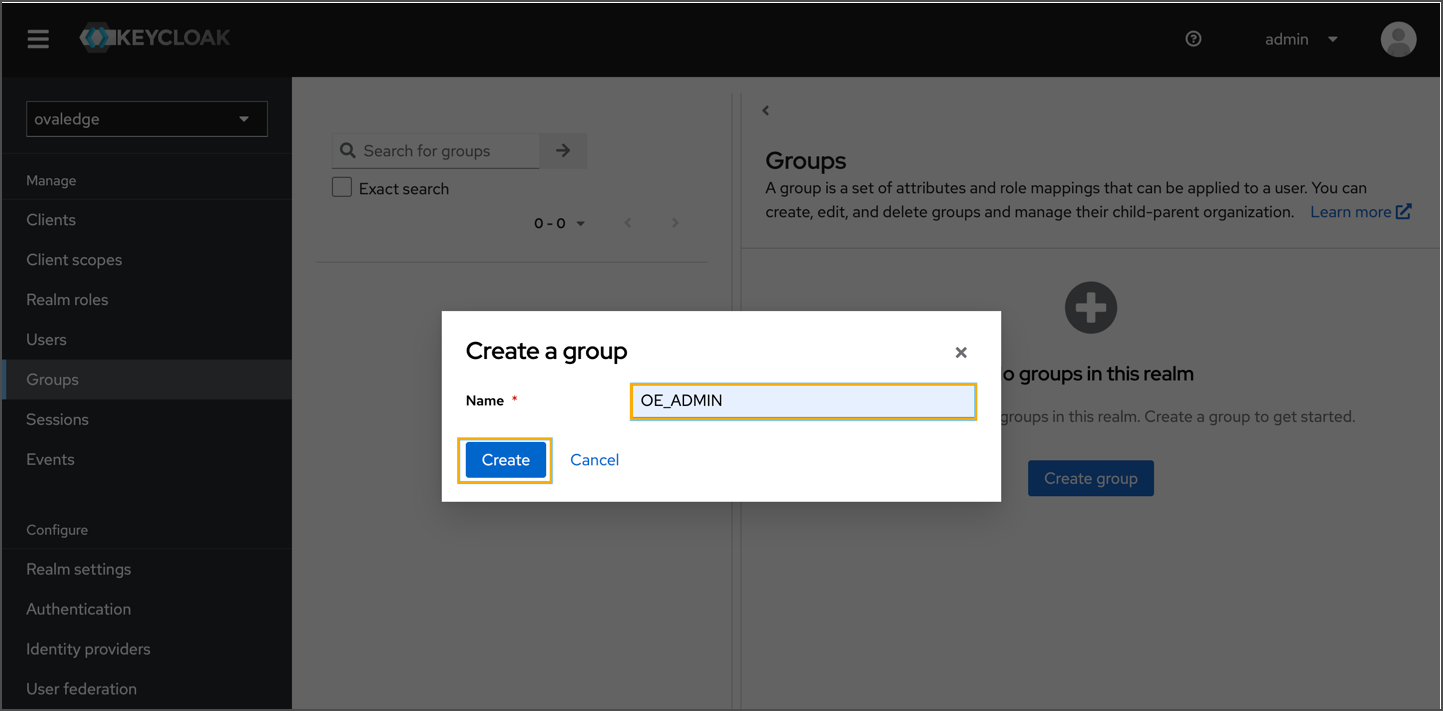
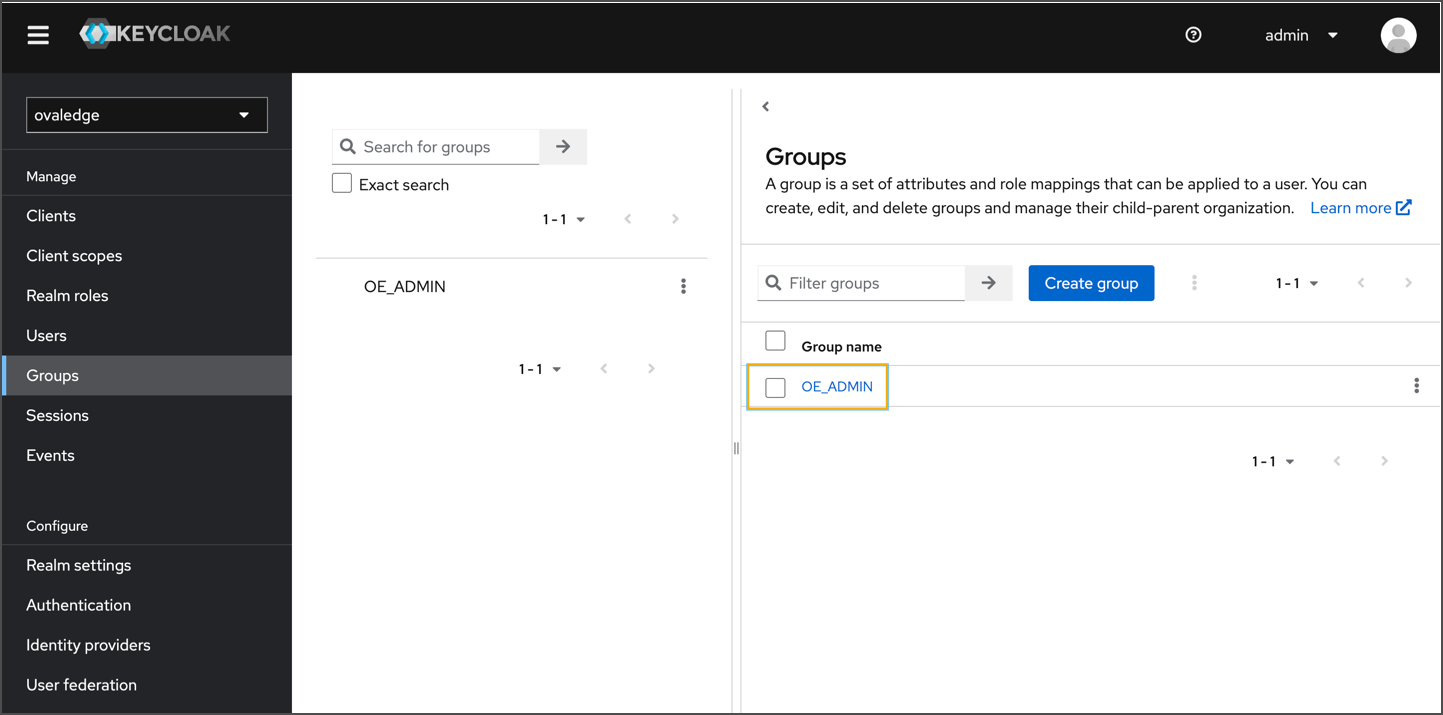
* Enter group name (e.g., OE\_ADMIN) → **Save**.
* Open the created group.
* **Members** tab → Add users to the group.
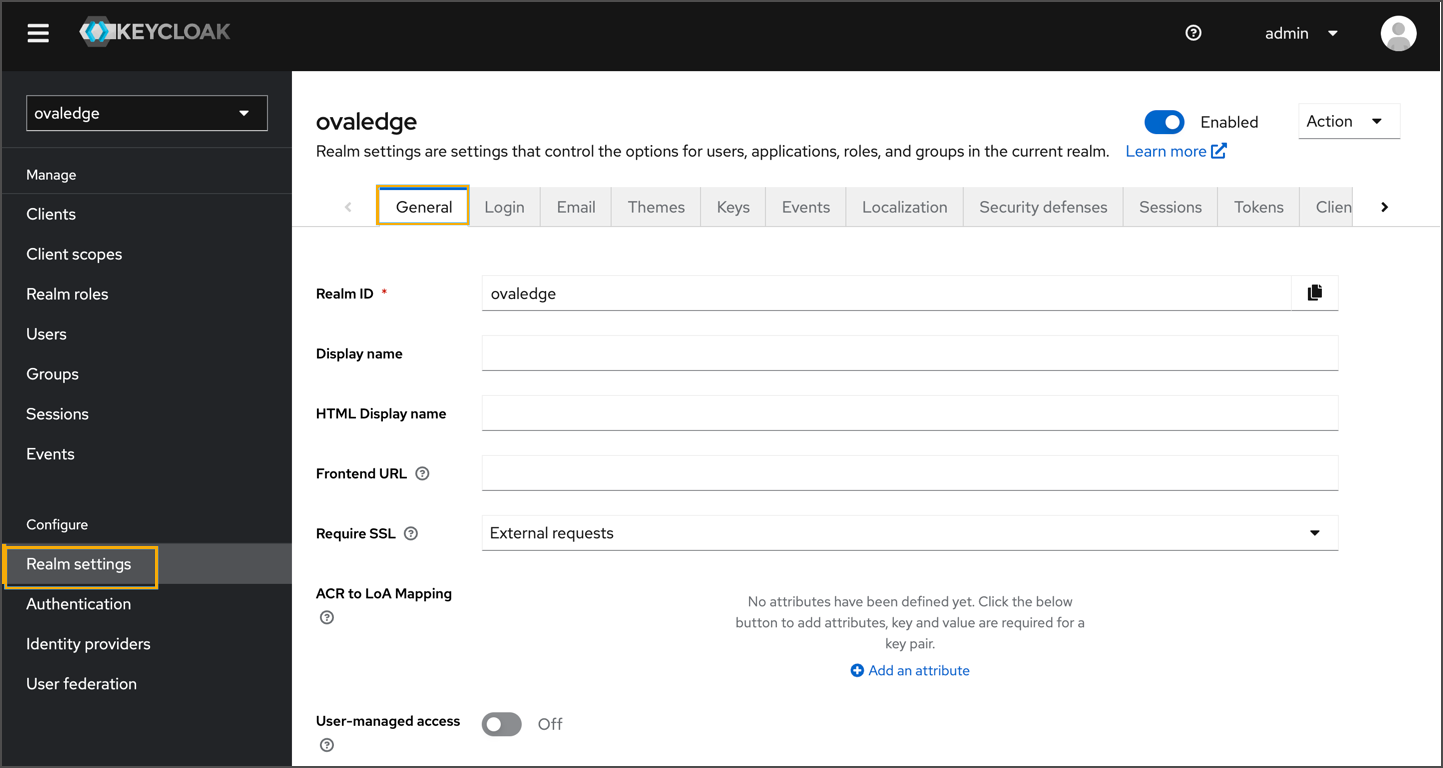
### Configure Realm Settings
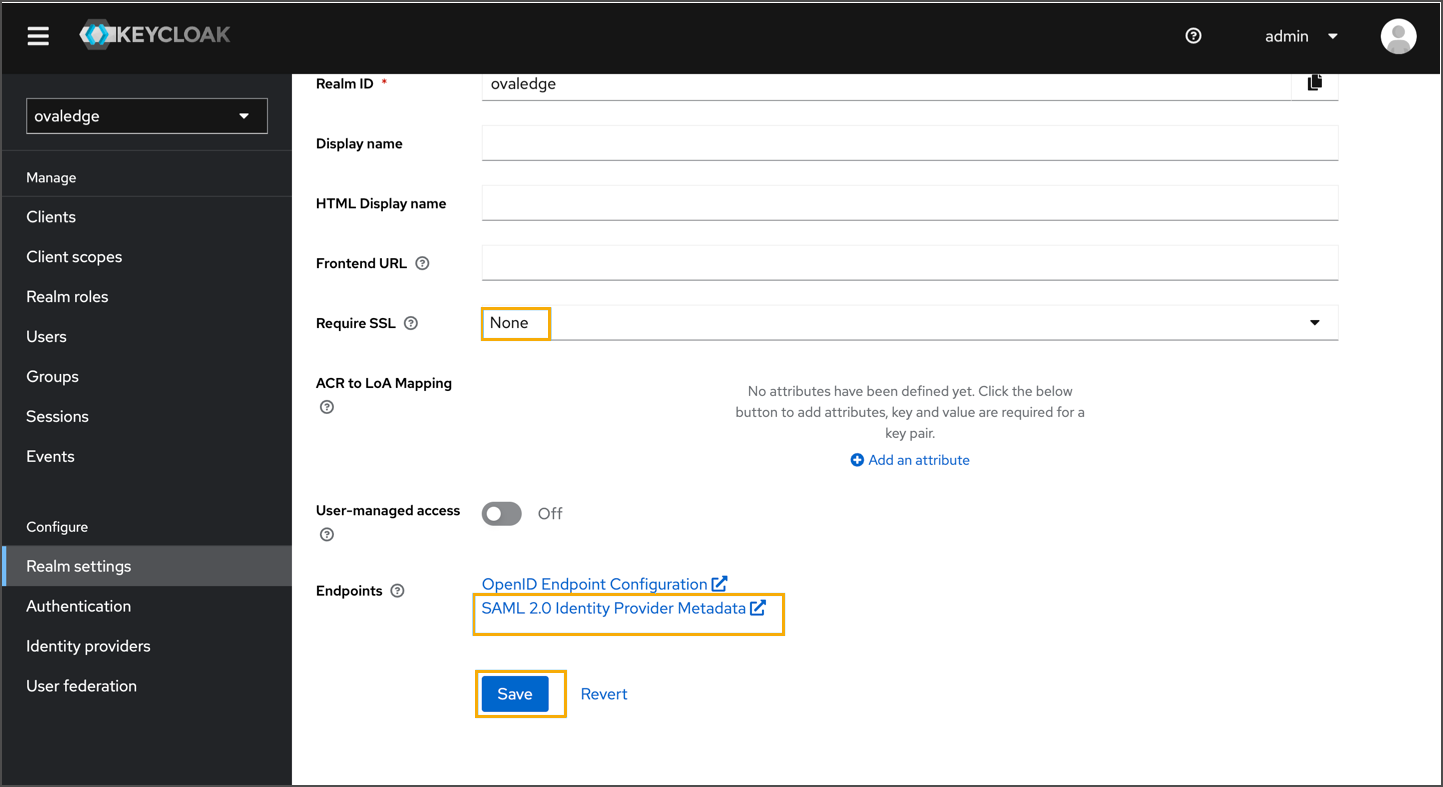
* Navigate to **Realm Settings**.
* Copy the **SAML Metadata URL**.
* Set **Require SSL** to `none`.
* Save the metadata URL for later use.
### Modify OvalEdge Configuration
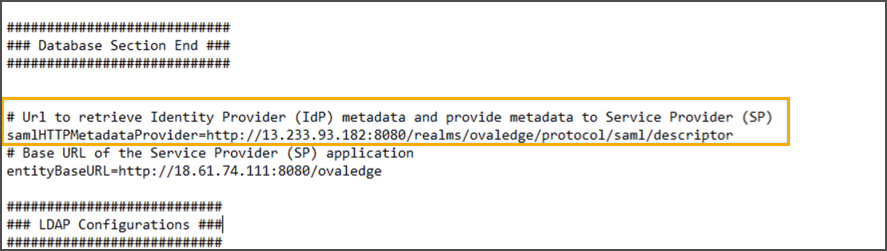
**A. Edit `oasis.properties`**
* Go to the OvalEdge application VM → `extprop` directory.
* Open `oasis.properties` and update:
```
saml.metadata.url =
entityBaseURL = http://:8080/ovaledge
```
* Save the file.
**B. Update Tomcat Environment**
**For Linux:**
* Edit `setenv.sh` in Tomcat bin directory.
* Add:
```
-DOVALEDGE_SECURITY_TYPE=saml
```
* Save and close.
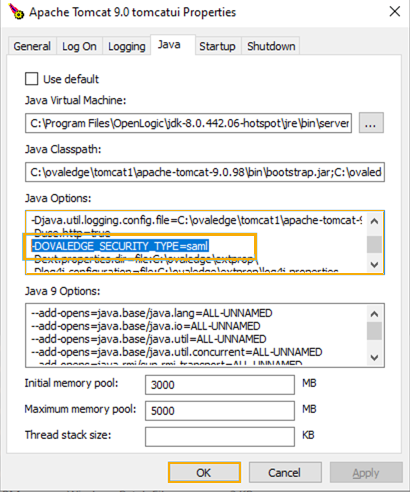
**For Windows:**
* Open `tomcat9w.exe`.
* Go to **Java** tab.
* Add:
```
-DOVALEDGE_SECURITY_TYPE=saml
```