# MySQL 8.4.x on Amazon Linux

This article provides a comprehensive guide for installing **MySQL version 8.4.x** on an **Amazon Linux 2023** system. It covers the necessary prerequisites, step-by-step installation process, initial configuration, and performance optimization settings recommended by OvalEdge.

## Prerequisites

Ensure the following before proceeding:

* A user account with **sudo privileges**
* A **stable internet connection**
* Access to the **MySQL VM** where the installation will take place

## Installation

1. **Update System Packages**
   * Log in to the MySQL virtual machine (VM) and run the following command to update the package manager:

     ```bash
     sudo yum update -y
     ```

     \
     *Sample Reference Screenshot:*

     <figure><img src="/files/JZW6YC1rFnXt4sSJsTxi" alt=""><figcaption></figcaption></figure>

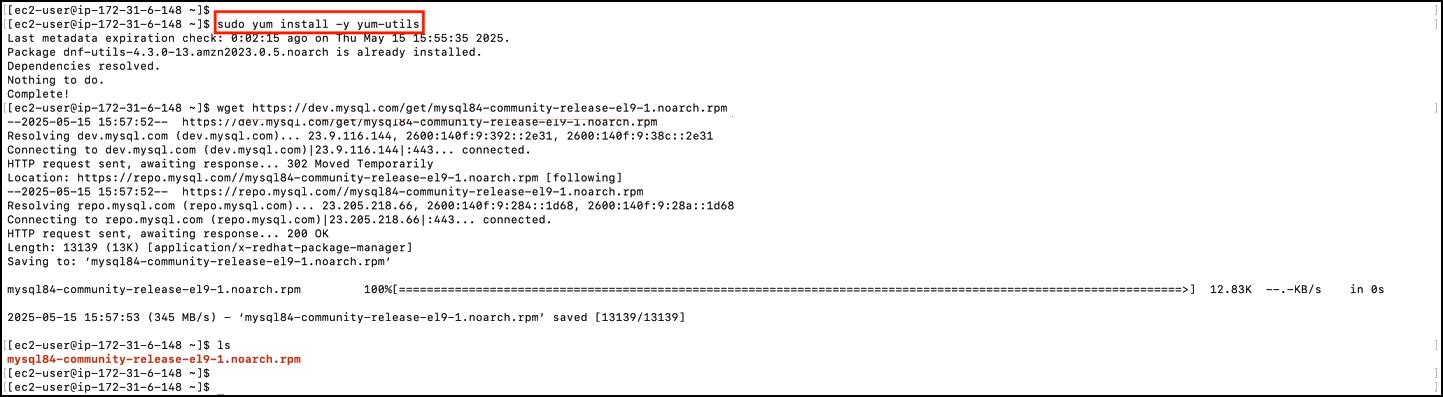
2. **Install Required Utilities**
   * Official MySQL RPM package link:\
     [https://dev.mysql.com/get/mysql84-community-release-el9-1.noarch.rpm](https://dev.mysql.com/get/mysql84-community-release-el9-1.noarch.rpm?utm_source=chatgpt.com)
   * Install the **yum-utils** package for managing repository configurations:

     ```bash
     sudo yum install -y yum-utils
     ```

     \
     *Sample Reference Screenshot:*

     <figure><img src="/files/LJcWvYnYQW53ioIMwyE9" alt=""><figcaption></figcaption></figure>

3. **Download and Install the MySQL Yum Repository**
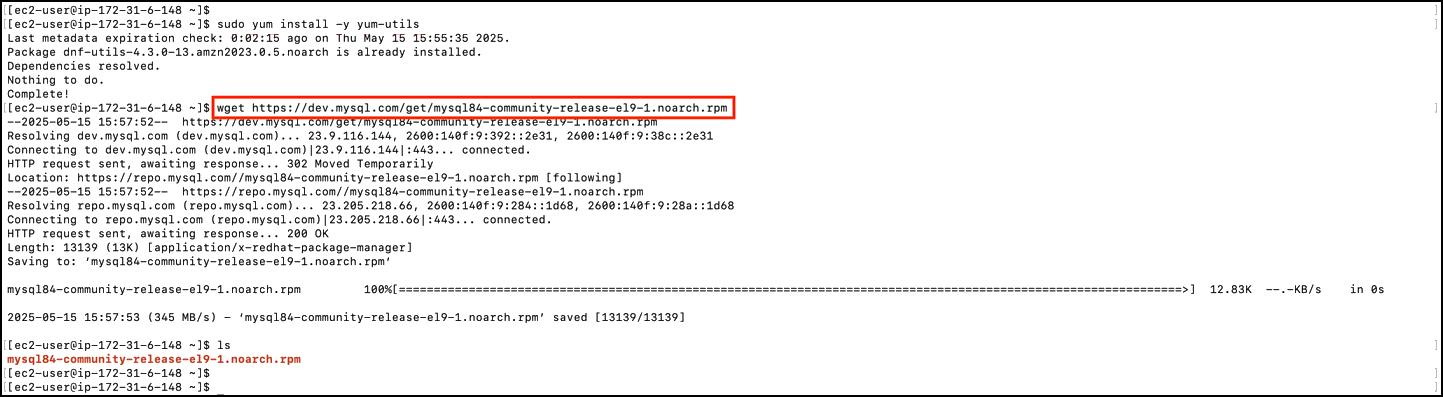
   * Download the MySQL 8.4 Community Repository RPM package:

     ```bash
     wget https://dev.mysql.com/get/mysql84-community-release-el9-1.noarch.rpm
     ```

     \
     *Sample Reference Screenshot:*

     <figure><img src="/files/HAnAtnc8dgLzurQybiTJ" alt=""><figcaption></figcaption></figure>
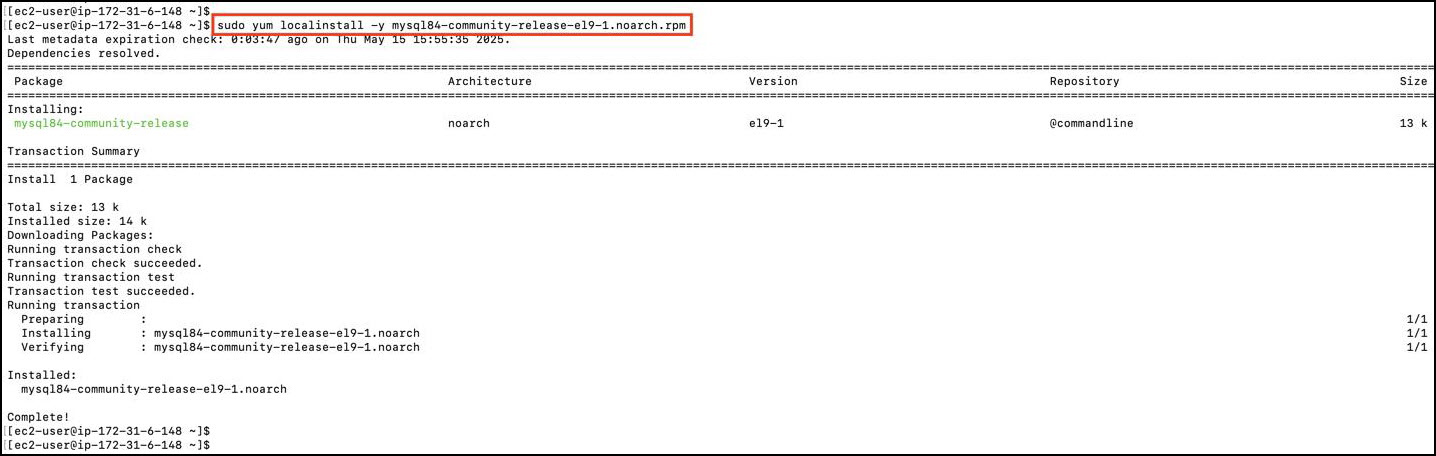
   * Install the repository package:

     ```bash
     sudo yum localinstall -y mysql84-community-release-el9-1.noarch.rpm
     ```

     \
     *Sample Reference Screenshot:*

     <figure><img src="/files/iJAmuO8WIPWbDksfpU9t" alt=""><figcaption></figcaption></figure>

4. **Install MySQL Server**
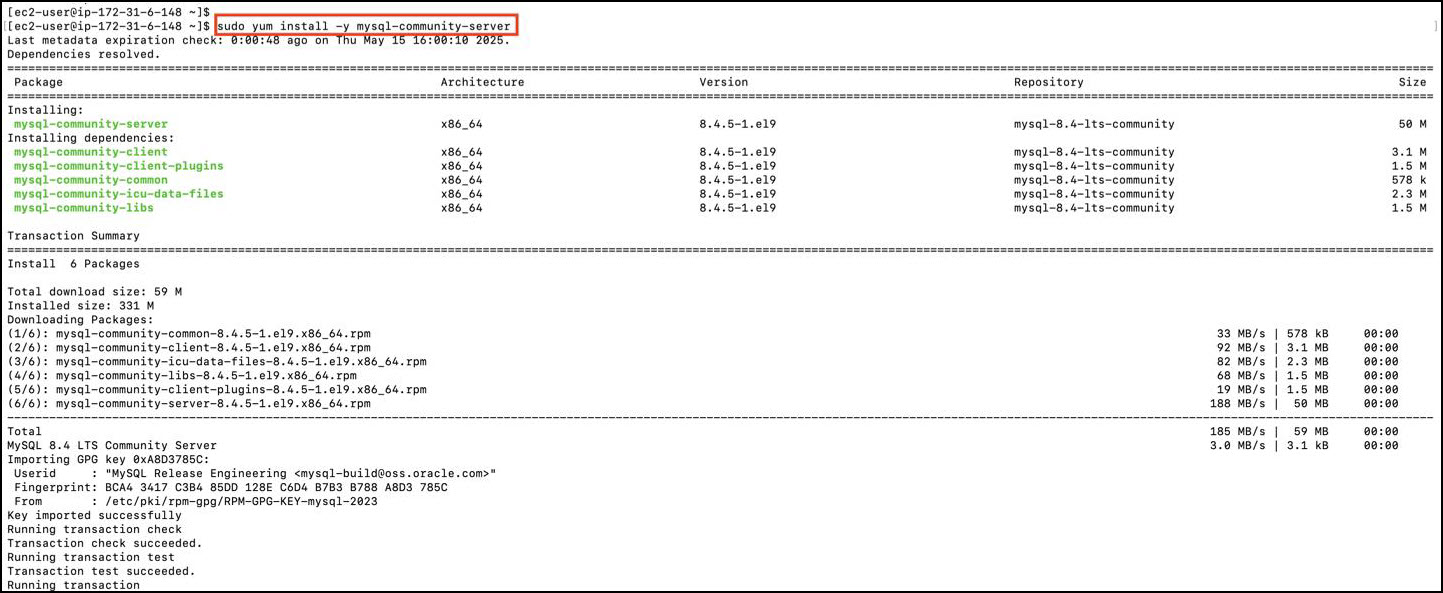
   * Install the MySQL 8.4.x community server package:

     ```bash
     sudo yum install -y mysql-community-server
     ```

     \
     *Sample Reference Screenshot:*

     <figure><img src="/files/VSkUsK7g2XcWkudyhnQv" alt=""><figcaption></figcaption></figure>

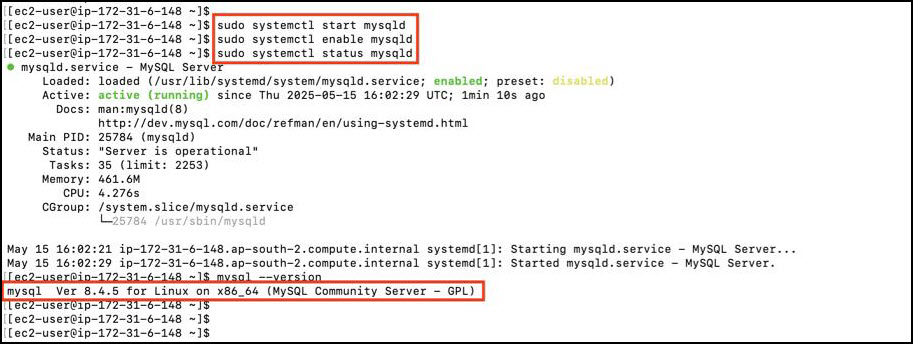
5. **Start and Enable MySQL Service**
   * Start the MySQL service and enable it to start at boot using the following commands:

     ```bash
     sudo systemctl start mysqld
     sudo systemctl enable mysqld
     sudo systemctl status mysqld
     ```

     \
     *Sample Reference Screenshot:*

     <figure><img src="/files/ZYTzMAuUq2FTellMYZcn" alt=""><figcaption></figcaption></figure>

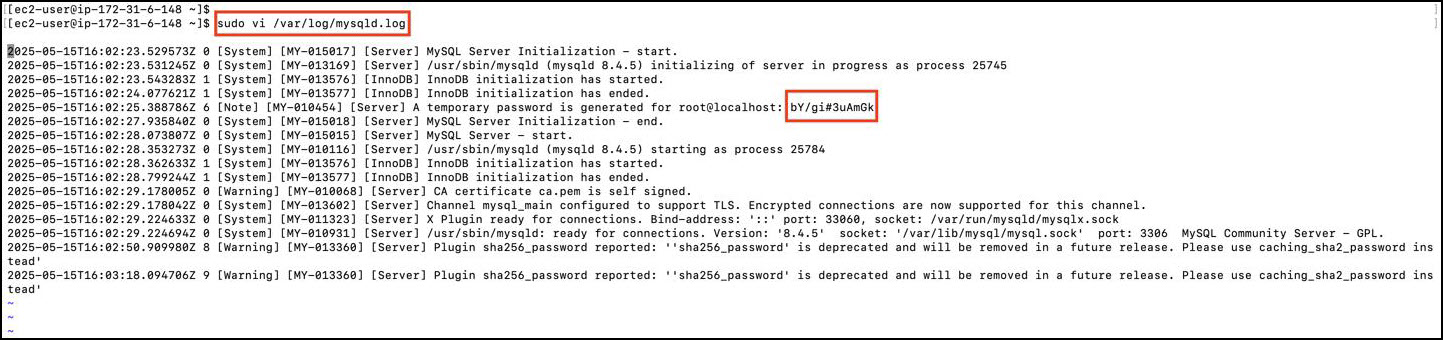
6. **Retrieve Temporary Root Password**
   * MySQL generates a temporary root password upon initial startup. Retrieve it from the log file:

     ```bash
     sudo vi /var/log/mysqld.log
     ```

     \
     *Sample Reference Screenshot:*

     <figure><img src="/files/YNKGj9KG6asPWaZ6ydp6" alt=""><figcaption></figcaption></figure>
   * Search for the line containing **temporary password**.<br>

7. **Secure MySQL and Set Permanent Root Password**
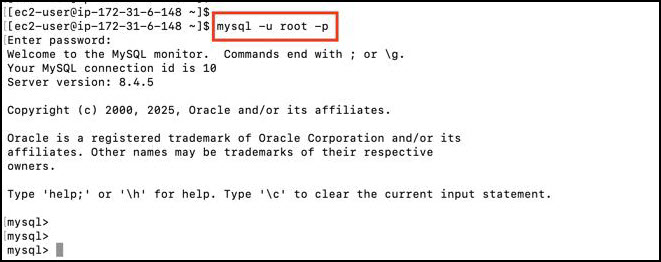
   * Log in to the MySQL shell using the temporary password:

     ```bash
     mysql -u root -p
     ```

     \
     *Sample Reference Screenshot:*

     <figure><img src="/files/apTACj1fJOSykdxr1Ya5" alt=""><figcaption></figcaption></figure>
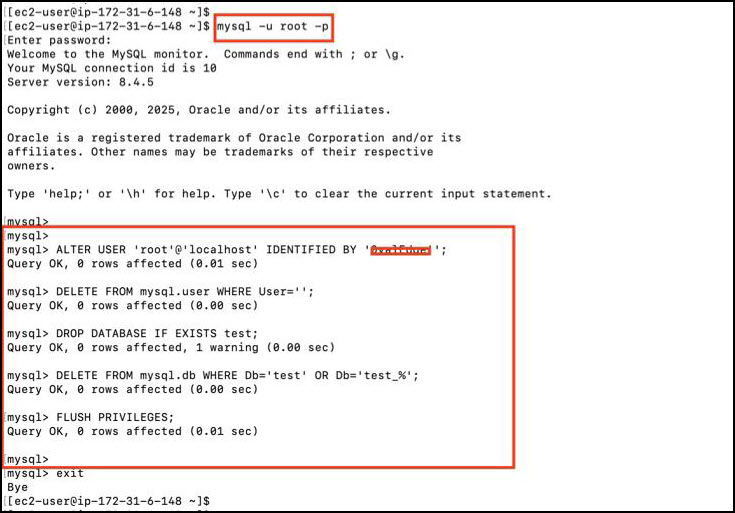
   * Execute the following SQL commands to set a new root password and secure the installation:

     ```sql
     ALTER USER 'root'@'localhost' IDENTIFIED BY '<new_secure_password>';
     DELETE FROM mysql.user WHERE User='';
     DROP DATABASE IF EXISTS test;
     DELETE FROM mysql.db WHERE Db='test' OR Db='test_%';
     FLUSH PRIVILEGES;
     ```

     \
     *Sample Reference Screenshot:*

     <figure><img src="/files/2vvpN9DEgFOxZ4NcnrRI" alt=""><figcaption></figcaption></figure>

     <div data-gb-custom-block data-tag="hint" data-style="info" class="hint hint-info"><p>Replace <code>&#x3C;new_secure_password></code> with a strong password that complies with MySQL's password policy.</p></div>

8. **Configure MySQL Parameters**
   * Edit the MySQL configuration file to apply recommended settings:

     ```bash
     sudo vi /etc/my.cnf
     ```
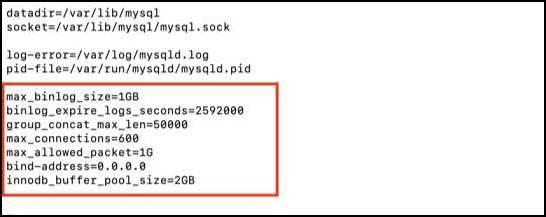
   * Add or update the following parameters:

     ```ini
     max_binlog_size = 1G
     binlog_expire_logs_seconds = 2592000
     group_concat_max_len = 4294967295
     max_connections = 600
     max_allowed_packet = 1G
     bind-address = 0.0.0.0
     innodb_buffer_pool_size = 8G
     ```

     \
     *Sample Reference Screenshot:*

     <div align="left"><figure><img src="/files/4qdRRoN6SjW6DkOxf0L6" alt=""><figcaption></figcaption></figure></div>

     <div data-gb-custom-block data-tag="hint" data-style="info" class="hint hint-info"><ul><li>Set <code>bind-address = 0.0.0.0</code> only if the MySQL server and client applications are on separate machines.</li><li>Configure <code>innodb_buffer_pool_size</code> to approximately <strong>50–70% of available system RAM</strong> for optimal performance.</li></ul></div>

     <br>

9. **Restart MySQL Service**
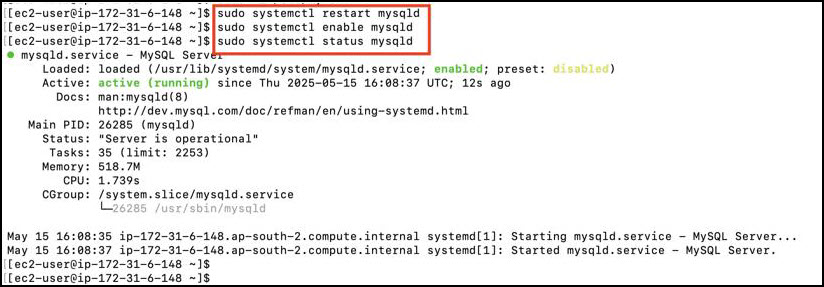
   * Apply the configuration changes by restarting the MySQL service:

     ```bash
     sudo systemctl restart mysqld
     sudo systemctl enable mysqld
     ```

     \
     *Sample Reference Screenshot:*

     <figure><img src="/files/I4F1CPwbSn9Jga0ODIGI" alt=""><figcaption></figcaption></figure>

10. **Create OvalEdge Database**
    * Once the above steps are completed, download the **MasterScripts file** provided by the OvalEdge team in the MySQL VM, as shown below.

      <figure><img src="/files/nfB7sHvOctMbgtA5najs" alt=""><figcaption></figcaption></figure>
    * Transfer the **MasterScripts SQL file** (provided by OvalEdge) to the MySQL virtual machine.
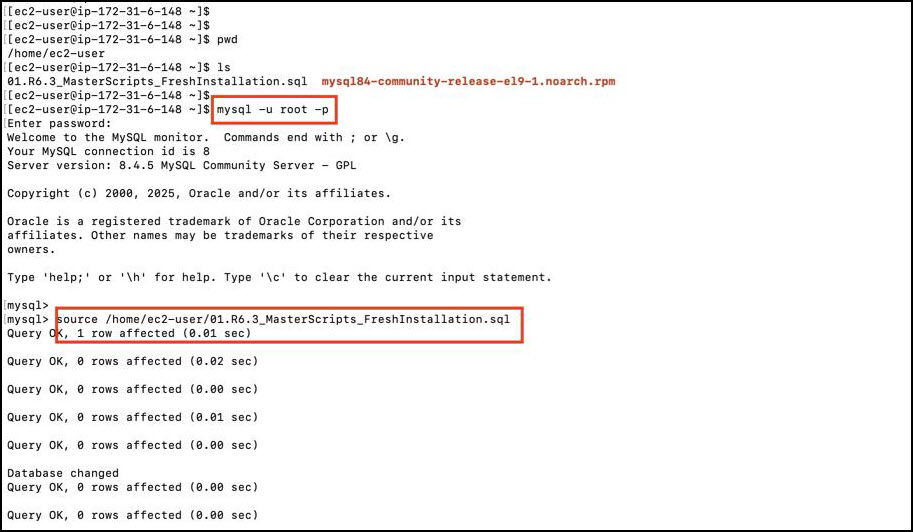
    * Log in to MySQL:

      ```bash
      mysql -u root -p
      ```
    * Run the MasterScripts file using the `source` command:

      ```sql
      source /path/to/MasterScripts.sql;
      ```

      \
      *Sample Reference Screenshot:*

      <figure><img src="/files/AaGYrnOOYfT8OJEpmWq6" alt=""><figcaption></figcaption></figure>
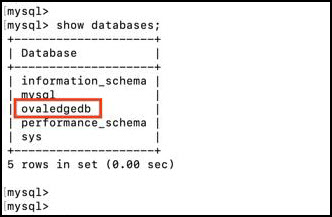
    * Verify the database creation:

      ```sql
      SHOW DATABASES;
      ```

      \
      *Sample Reference Screenshot:*

      <div align="left"><figure><img src="/files/6tDBOB9UMFPw1qh362SP" alt=""><figcaption></figcaption></figure></div>

      <div data-gb-custom-block data-tag="hint" data-style="info" class="hint hint-info"><p>Confirm that the <strong>ovaledgedb</strong> database is listed.</p></div>

***

Copyright © 2025, OvalEdge LLC, Peachtree Corners, GA, USA.


---

# Agent Instructions: Querying This Documentation

If you need additional information that is not directly available in this page, you can query the documentation dynamically by asking a question.

Perform an HTTP GET request on the current page URL with the `ask` query parameter:

```
GET https://docs.ovaledge.com/release8.1/deployment-and-maintenance/installation/mysql-8.4.x-on-amazon-linux.md?ask=<question>
```

The question should be specific, self-contained, and written in natural language.
The response will contain a direct answer to the question and relevant excerpts and sources from the documentation.

Use this mechanism when the answer is not explicitly present in the current page, you need clarification or additional context, or you want to retrieve related documentation sections.