Tomcat 10.1.x on Ubuntu 22.04

This article provides detailed steps to install and configure the OvalEdge Application on an Ubuntu 22.04 machine. It includes both single-instance and multi-instance (UI and Job) deployment options using Apache Tomcat.

Prerequisites

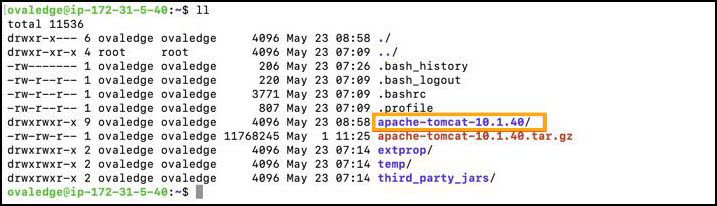
Single-Instance Deployment (Single Tomcat)

  1. Create Required Directories

    • Log in to the application VM and create the following directories to store application configuration files and dependencies:

      mkdir ~/extprop ~/temp ~/third_party_jars

      circle-info
      • The oasis.properties and log4j.properties files will be provided by the OvalEdge Team. Place them in the extprop folder.

      • JAR files required for the application will also be provided. Place them in the third_party_jars folder.

  2. Place Configuration Files

    • Download and place the following files into the respective folders (provided by OvalEdge Support):

      • oasis.properties~/extprop/

      • log4j.properties~/extprop/

      • Third-party JARs → ~/third_party_jars/

  3. Download and Extract Tomcat

    • Download the required JAR file into the third_party_jars folder as shown below. The JAR files will be provided by the OvalEdge team.

    • Now download the Tomcat using the URL below as shown.

      Link: Tomcat Linkarrow-up-right

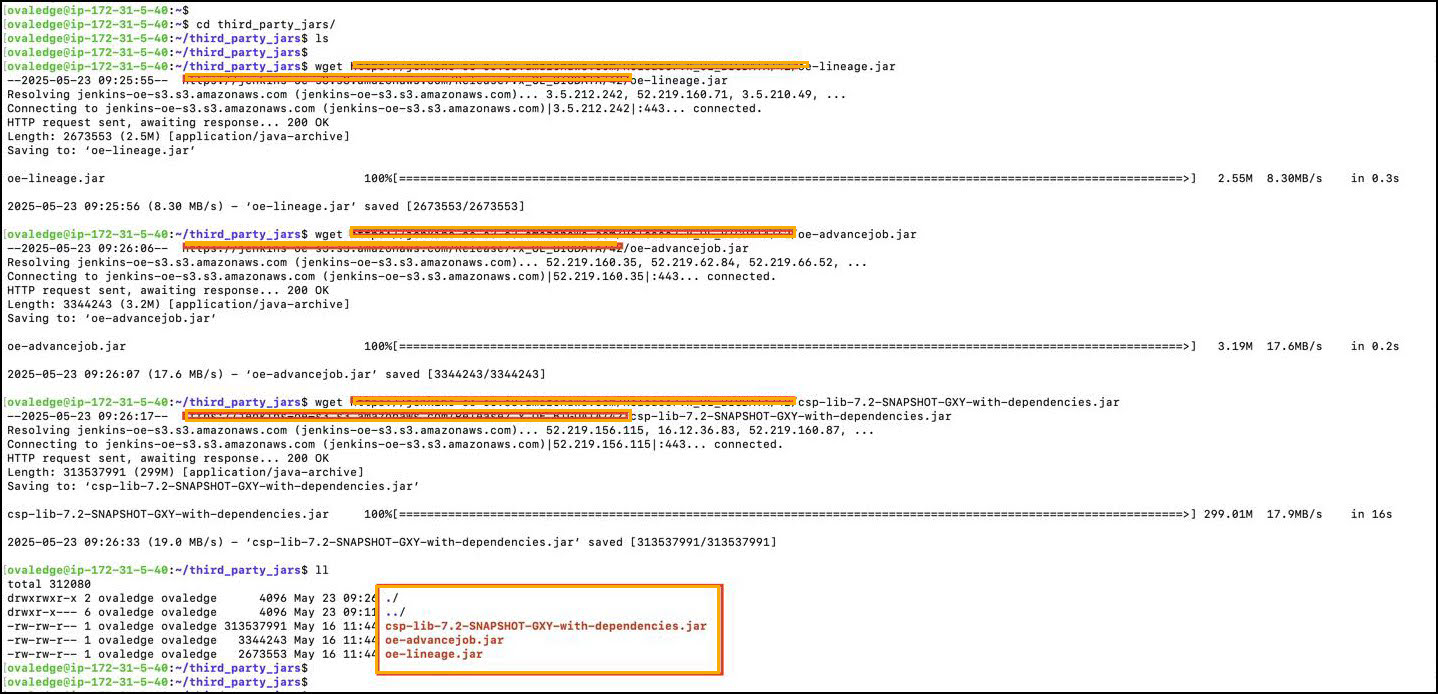
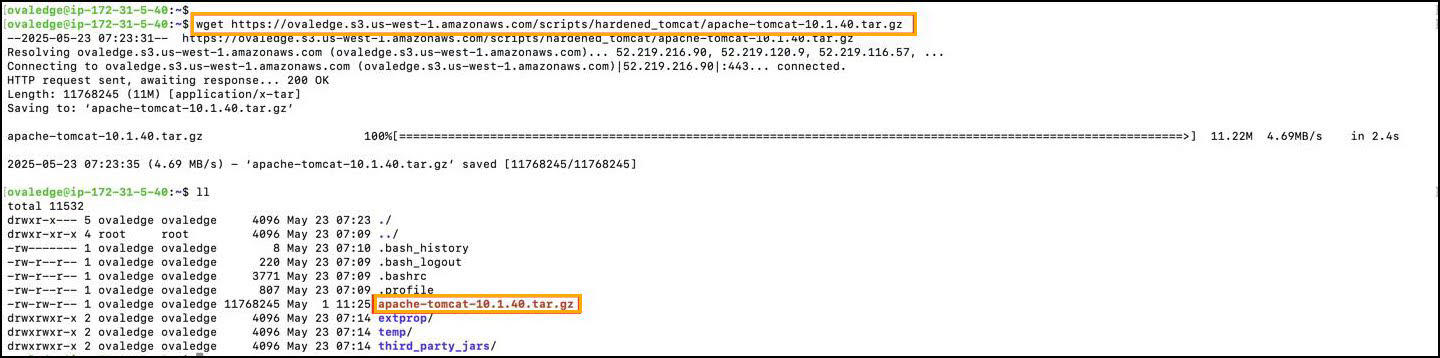
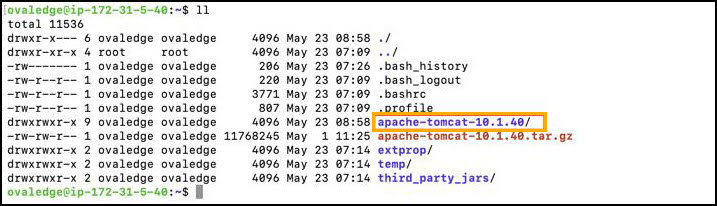
      wget https://ovaledge.s3.us-west-1.amazonaws.com/scripts/hardened_tomcat/apache-tomcat-10.1.40.tar.gz
      tar -xvf apache-tomcat-10.1.40.tar.gz

  4. Configure Environment Variables

    • Navigate to the Tomcat bin directory and create the setenv.sh file:

      vi apache-tomcat-10.1.40/bin/setenv.sh

      Add the following (replace <client_input> with the actual key):

      export CATALINA_OPTS="-Duse.http=true -DOVALEDGE_SECURITY_TYPE=db \
      -Dlog4j.configuration=file:/home/ovaledge/extprop/log4j.properties \
      -Dext.properties.dir=file:/home/ovaledge/extprop/ -Xms4g -Xmx7g \
      -DOVALEDGE_ENCRYPT_DECRYPT_KEY=<client_input> \
      --add-opens=jdk.zipfs/jdk.nio.zipfs=ALL-UNNAMED \
      --add-opens=java.base/jdk.internal.loader=ALL-UNNAMED \
      --add-opens=java.base/java.net=ALL-UNNAMED"

      ✅ Ensure the path to oasis.properties and log4j.properties is correct.

  5. Deploy OvalEdge Application

    • Navigate to the webapps directory and copy or download the ovaledge.war file (provided by the OvalEdge Team):

      • Place the ovaledge.war file into the webapps directory.

  6. Update Configuration Files

    • Edit oasis.properties in extprop folder

      • Database Section: Replace localhost, username, and password with your MySQL connection details.

      • Elasticsearch Section:

        • Set elasticsearch.enabled=true

        • Set es.host and es.password with actual values

      • Update the JARs path to point to the third_party_jars folder:

        • /home/ovaledge/third_party_jars

    • Save the file after making changes.

  7. Update log4j.properties Configuration

    • Edit the log4j.properties file in the extprop directory:

      • Uncomment the 1st line

      • Comment the 2nd line

    • Save the file after editing.

  8. Create Tomcat Service

    • Create a systemd service file to manage Tomcat as a Linux service:

      sudo vi /etc/systemd/system/tomcat.service
    • Paste the following content:

      [Unit]
      Description=Apache Tomcat for OvalEdge
      After=network.target
      
      [Service]
      Type=forking
      WorkingDirectory=/home/ovaledge/apache-tomcat-10.1.40/bin
      ExecStart=/bin/bash /home/ovaledge/apache-tomcat-10.1.40/bin/startup.sh
      ExecStop=/bin/bash/home/ovaledge/apache-tomcat-10.1.40/bin/shutdown.sh
      User=ovaledge
      Group=ovaledge
      
      [Install]
      WantedBy=multi-user.target

    • Save and close the file.

  9. Start and Enable Tomcat

    • Run the following commands to register and start the Tomcat service:

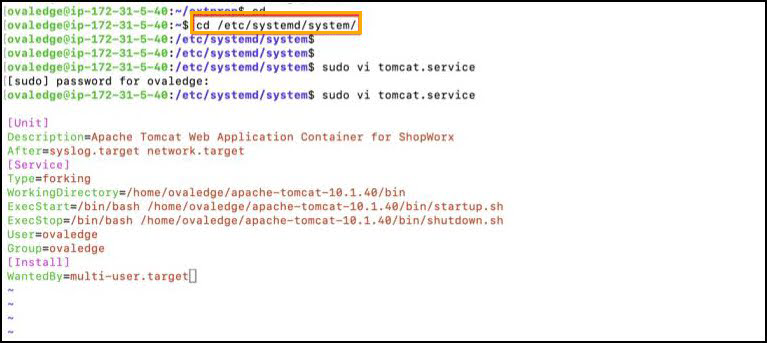
      sudo systemctl daemon-reload
      sudo systemctl enable tomcat
      sudo systemctl start tomcat

  10. Access the Application

    • After a few minutes, open a browser and go to:

      http://<VM-IP>:8080/ovaledge

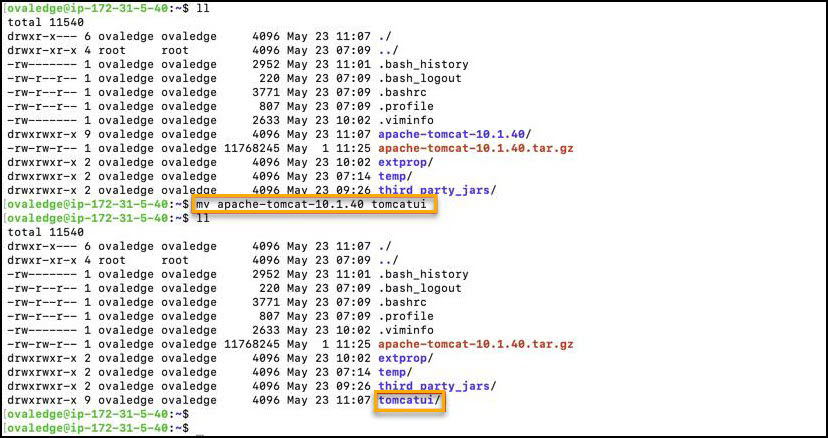
Multi Tomcat Installation

  1. Log in to Application VM

  2. Create Required Directories

    • Create the following directories to store configuration files and external libraries:

      circle-info
      • oasis.properties and log4j.properties will be provided by the OvalEdge team. Place them in the extprop folder.

      • JAR files required for the application should be placed in the third_party_jars folder.

  3. Download Required Files

    • Download the oasis.properties and log4j.properties files into the folder. These files will be shared by the OvalEdge team.

    • Download the JAR files provided by the OvalEdge team and place them in the third_party_jars folder.

    • Download Tomcat: Tomcat Linkarrow-up-right

      Extract the Apache Tomcat archive with the following command:

Tomcat UI Instance Setup

  • Once the above steps are completed, rename the apache-tomcat-10.1.40 directory to tomcatui as shown below.

Deploy WAR File

  • Navigate to the tomcatui/webapps folder and download the ovaledge.war file as shown below.

  • circle-info

    The ovaledge.war file will be provided by the OvalEdge team.

Configure Environment Variables

  • Create and edit the setenv.sh file inside tomcatui/bin:

  • Paste the following content (replace with the actual value shared by OvalEdge):

  • Save and exit.

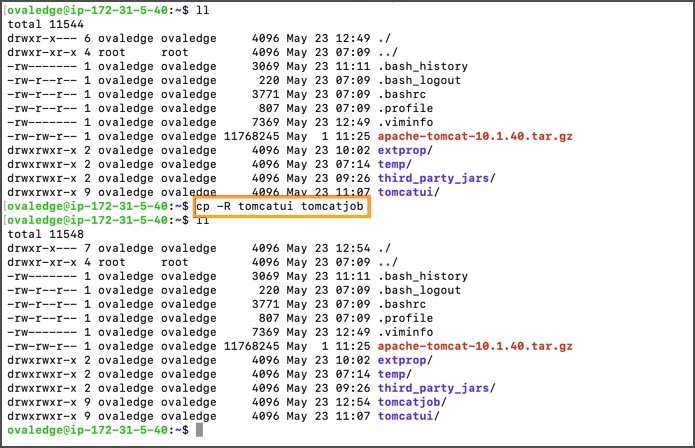
Tomcat Job Instance Setup

  • Duplicate the UI Tomcat Instance.

  • Update Job setenv.sh:

  • Replace the content with:

  • Ensure that the -Dpod.type is set to ovaledge-job-deployment.

  • Save and exit the file.

Update Ports in Job Instance

  • Edit server.xml:

  • Change the following ports to avoid conflicts with the UI instance:

    • Default Port New Port for Job

    • Shutdown port: 8005 → 8006

    • HTTP connector port: 8080 → 8081

  • Make sure all port references are updated correctly. Save and exit.

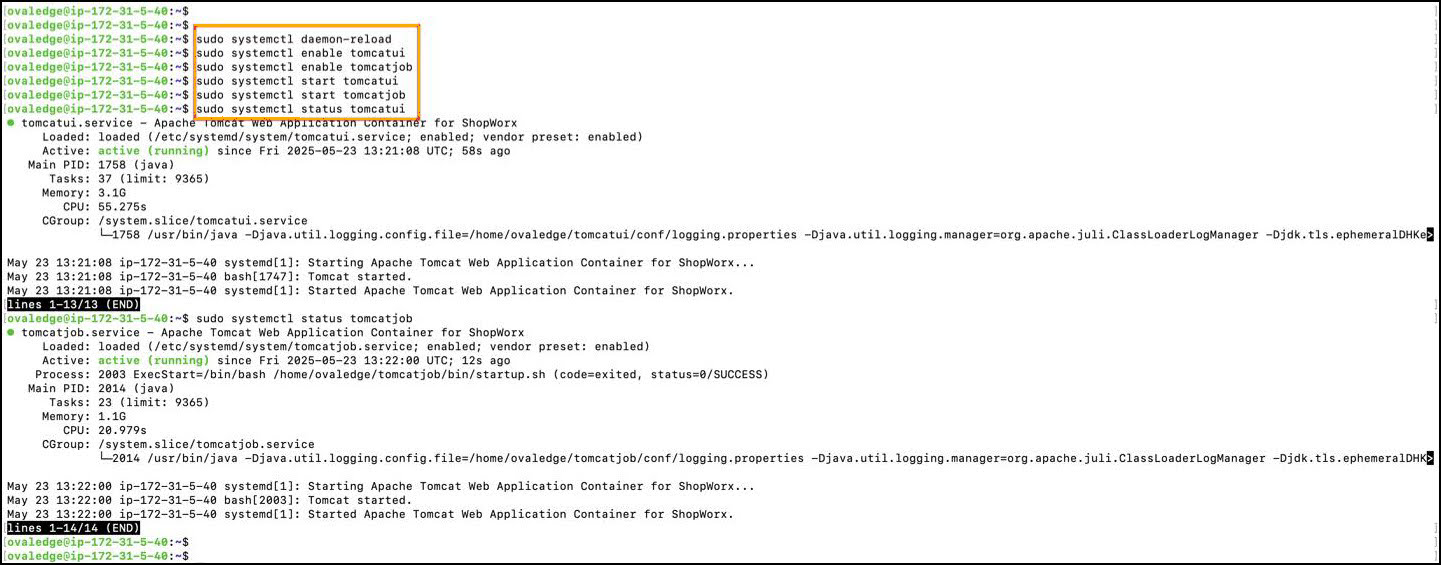
Expose Tomcat Instances as Systemd Services

To enable Tomcat UI and Job instances to start, stop, and restart as managed services on Linux, follow the steps below:

  • Navigate to the Systemd Directory.

  • Create the tomcatui Service File.

    • Create a systemd service unit for the UI instance:

    • Paste the following configuration:

    • Save and exit the file.

  • Create the Tomcat Job Service File.

    • Create the service file for the Job instance:

    • Insert the following content:

    • Save and exit the file.

  • Reload Systemd Services

    • Reload the systemd daemon to apply the newly created service units:

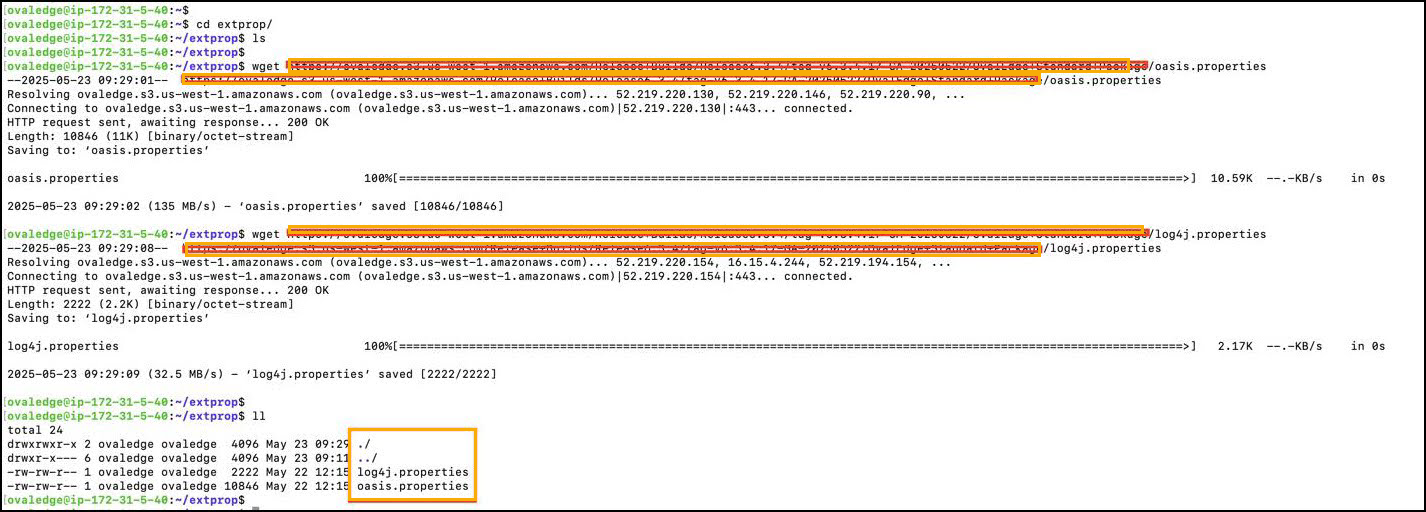
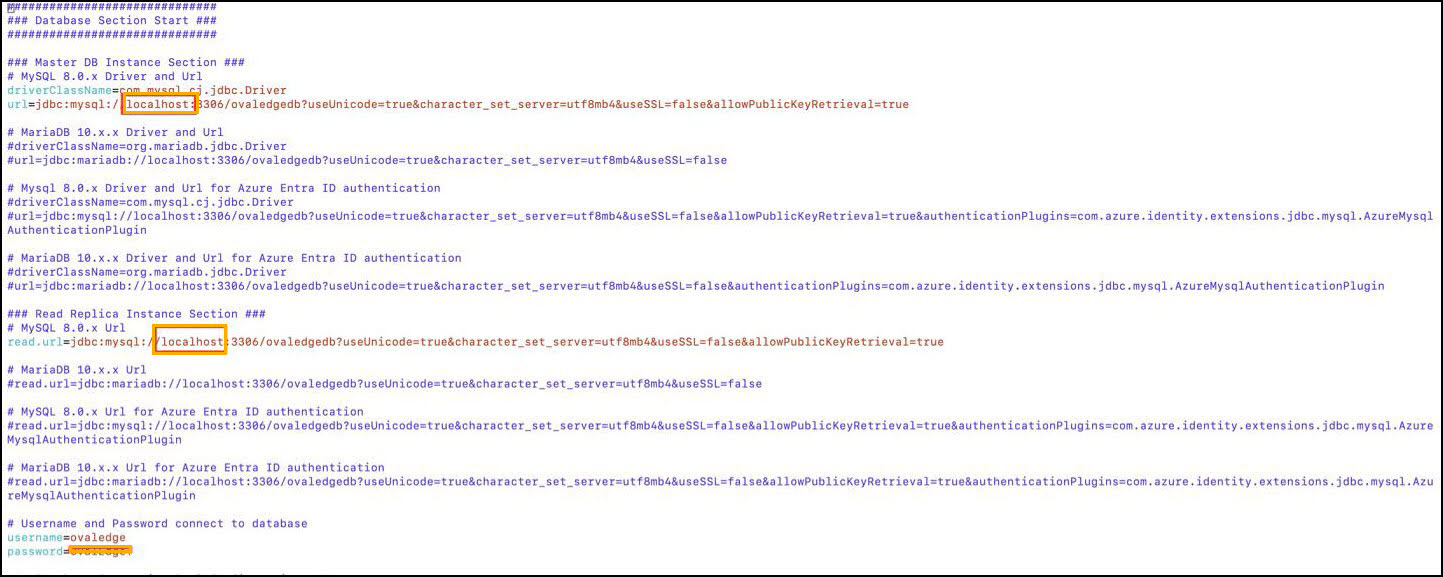
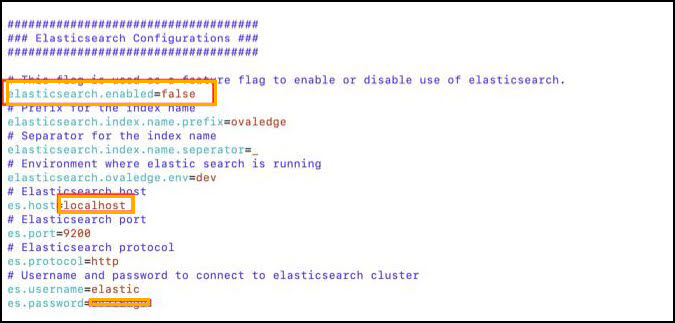
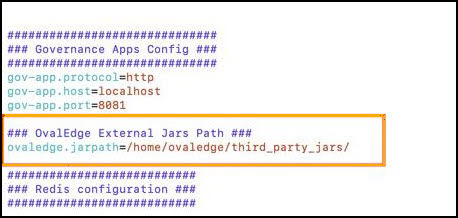
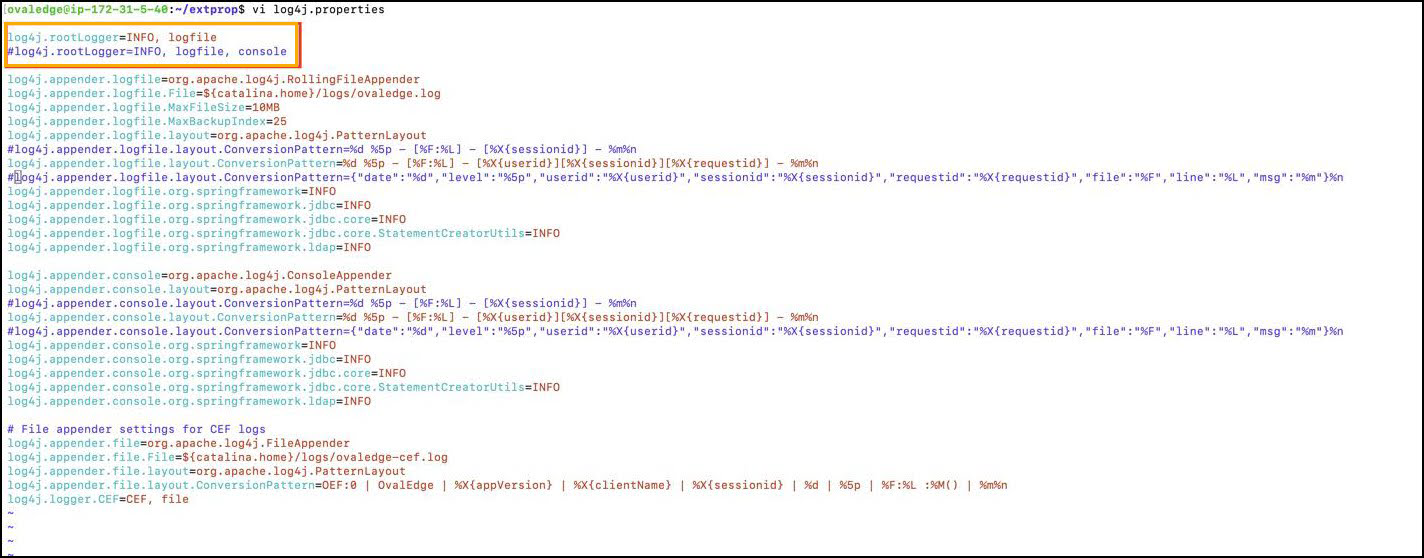
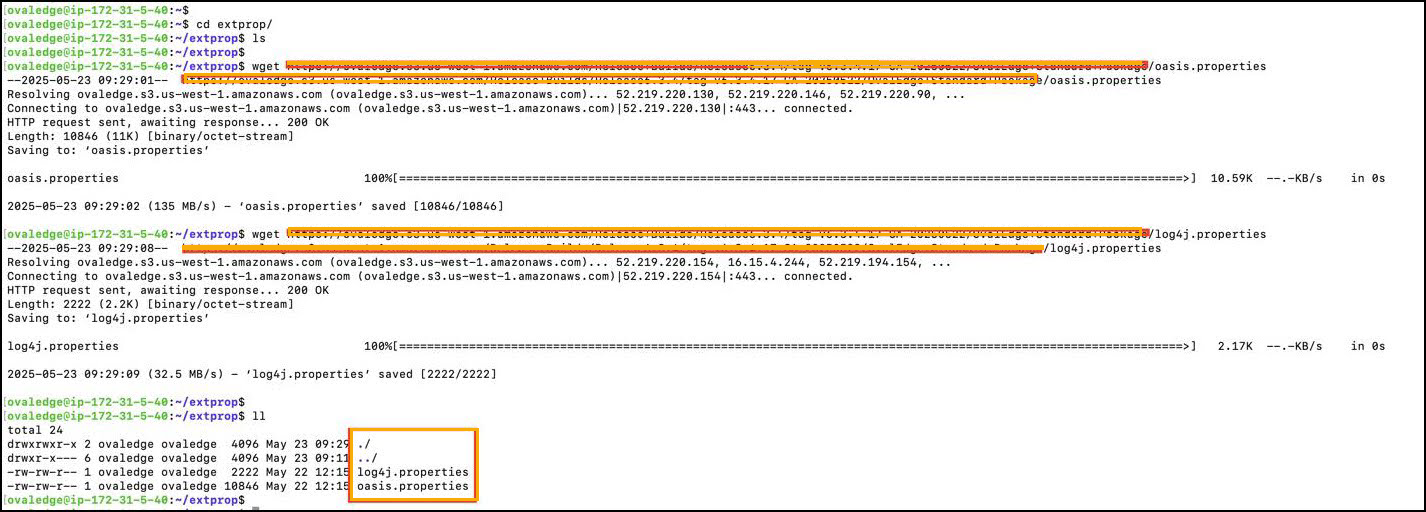
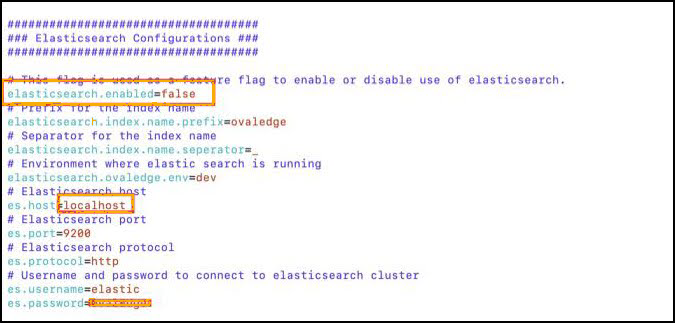
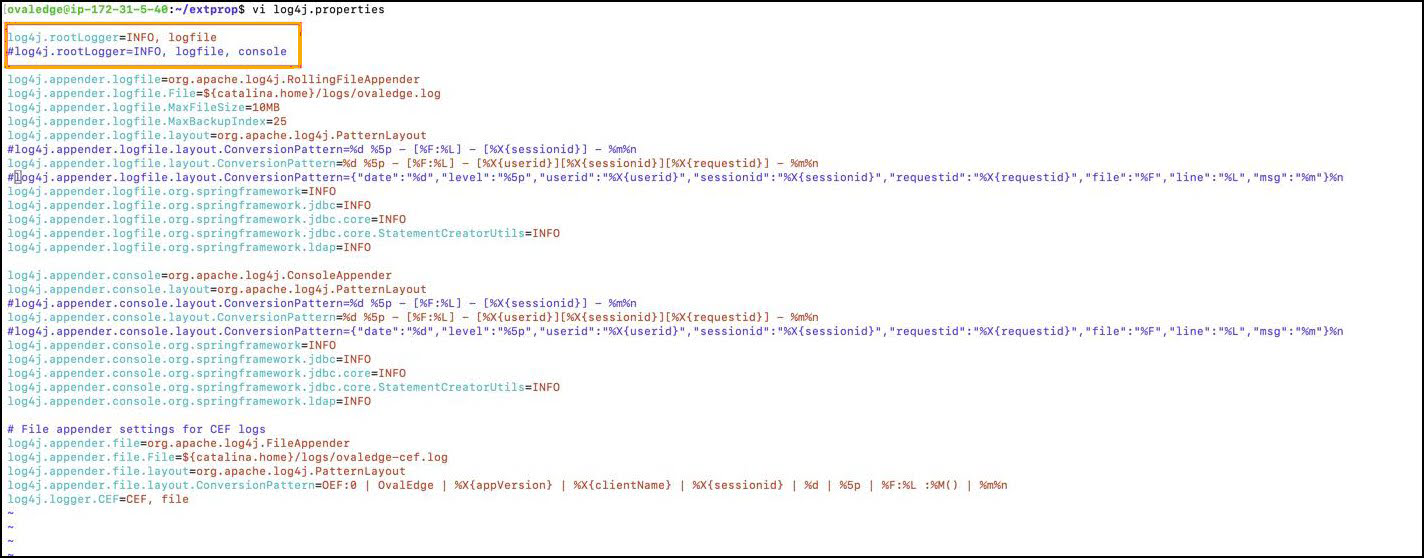
Configure oasis.properties and log4j.properties Files

After completing the deployment steps, configure the application properties to reflect your environment.

Edit oasis.properties File

  • Navigate to the extprop folder and open the file:

  • Database Configuration

    • Replace localhost with your MySQL endpoint.

    • Replace username and password with your actual MySQL credentials.

  • Elasticsearch Configuration

    • Set elasticsearch.enabled=true if Elasticsearch is available.

    • Provide your Elasticsearch host details.

    • Example:

  • JARs Path Configuration

    • Specify the correct path for external JAR files.

    • Example:

    • (Insert sample reference screenshot here)

  • Save and close the file.

Edit log4j.properties File

  • Navigate to the extprop folder and open the file:

  • At the top of the file, locate two lines — one commented out, the other active.

  • Update as follows:

    • Uncomment the first line.

    • Comment out the second line.

  • Save and close the file.

Start Tomcat Services

  • Reload systemd and enable Tomcat services to start on boot:

  • Start services:

Access the Application

  • Wait approximately 2 minutes after starting the services.

  • Open a web browser and access:

  • Replace <IP_ADDRESS> with the actual VM IP address.


Copyright © 2025, OvalEdge LLC, Peachtree Corners, GA, USA.

Was this helpful?