| Connector Category | Reporting Tools |
| Connector Version | Release6.3 |
| Releases Supported (Available from) | Release6.2.1 |
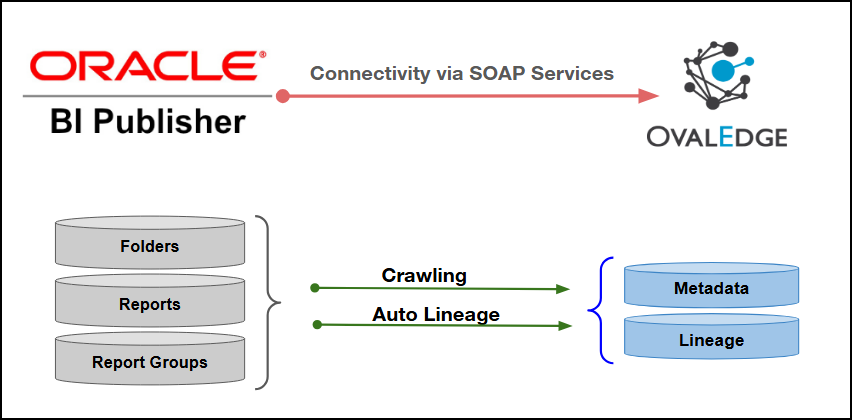
Connectivity [How the connection is established with OBIEE Publisher] | SOAP Services |
| OBIEE Publisher Object | OBIEE Publisher Property | OvalEdge Attribute | OvalEdge Type | OvalEdge Category |
|---|---|---|---|---|
| Folders | Top Level Folders | Report Group | Report Group | Reports |
| Folders | Sub Folders | Report Group | Report Group | Reports |
| Folders | Folder Type | Report Group Type | OBIEEPublisher | Reports |
| Data Model (.xdm) | relative path between domain root and “%2exdm” | Report | Report Name | Reports |
| Data Model (.xdm) | literal “Data Model” | Report Type | Data Model | Reports |
| Publisher Report (.xdo) | relative path between domain root and “%2exdo” | Report | Report Name | Reports |
| Publisher Report (.xdo) | literal “Publisher Report” | Report Type | Publisher Report | Reports |
| Objects | Permissions |
|---|---|
| Connector Validation | Read access to Publisher root folder path on filesystem |
| Crawling | Read/execute on Publisher base path (…/root/shared) and all nested folders/files |
| Lineage | Read access to .xdm/.xdo files |
| Delta Crawl | Read/execute on Publisher base path (…/root/shared) and all nested folders/files |
| Domains (Folders) | Read/execute on publisher path …/root/shared |
| Data Models (.xdm) | Read on all nested files under a domain; ability to traverse directories |
| Publisher Reports (.xdo) | Read on all nested files under a domain; ability to traverse directories |
| Source Code (Data Model/Publisher Report) | Read file content |
| Field Name | Description |
|---|---|
| Connector Type | By default, "OBIEEPUBLISHER" is displayed as the selected connector type. |
| Credential Manager* | Select the desired credentials manager from the drop-down list. Relevant parameters will be displayed based on the selected option. Supported Credential Managers:
|
| License Add Ons |
|
| Connector Environment | Select the environment (Example: PROD, STG) configured for the connector. |
| Connector Name* | Enter a unique name for the OBIEE Publisher connection (Example: "OBIEEPublisherdb"). |
| Host Name* | Enter the host name or IP address of the server where OBIEE Publisher is installed. |
| Port* | Enter the port number used by the OBIEE Publisher instance for communication. |
| Username* | Enter the OBIEE Publisher account name or domain user name with access to the Reporting Services instance. |
| Password* | Enter the password associated with the specified OBIEE Publisher account used for authentication. |
| Default Governance Roles* | Select the appropriate users or teams for each governance role from the drop-down list. All users configured in the security settings are available for selection. |
| Admin Roles* | Select one or more users from the dropdown list for Integration Admin and Security & Governance Admin. All users configured in the security settings are available for selection. |
| No Of Archive Objects* | This shows the number of recent metadata changes to a dataset at the source. By default, it is off. To enable it, toggle the Archive button and specify the number of objects to archive. Example: Setting it to 4 retrieves the last four changes, displayed in the 'Version' column of the 'Metadata Changes' module. |
| Select Bridge* | If applicable, select the bridge from the drop-down list. The drop-down list displays all active bridges that have been configured. These bridges facilitate communication between data sources and the system without requiring changes to firewall rules. |