

| Field Name | Description |
|---|---|
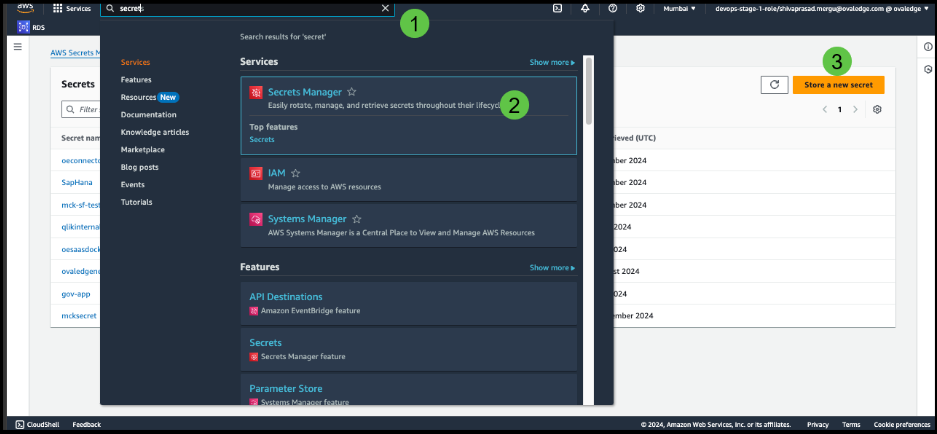
| Connector Type | By default, "AWS Secrets Manager" is displayed as the selected connector type. |
| Authentication* | Select Authentication from the drop-down list.
|
| IAM User Authentication | |
| License Add Ons | OvalEdge connectors have a default license add-on for data crawling and profiling. |
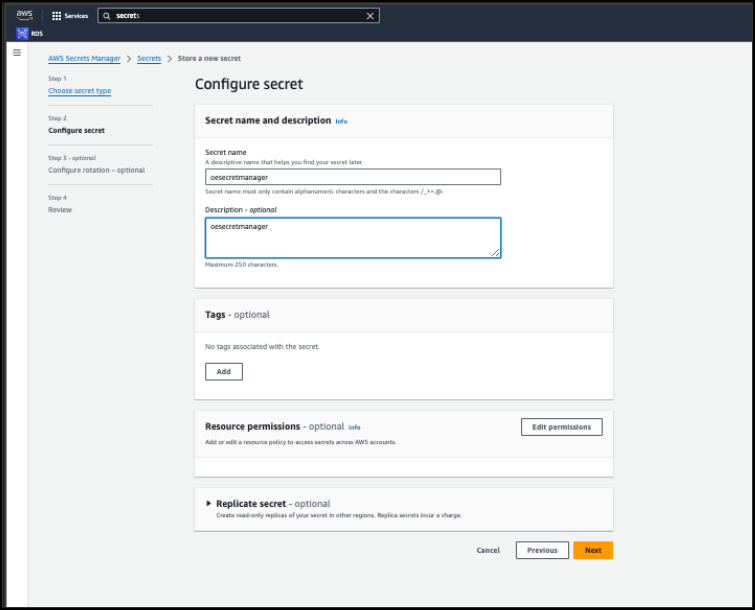
| Connector Name* | Enter a unique name for the AWS Secrets Manager connection (Example: "AWSSecrets_Prod"). |
| Connector Environment | Select the environment (Example: PROD, STG) configured for the connector. |
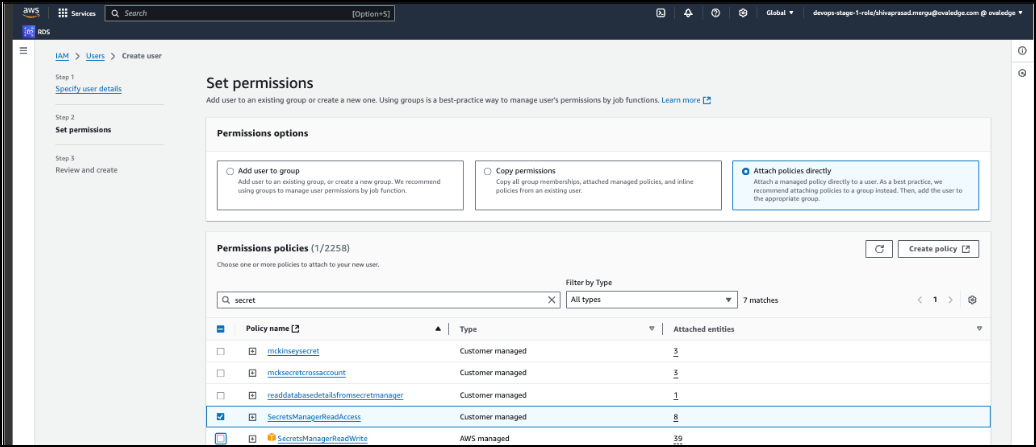
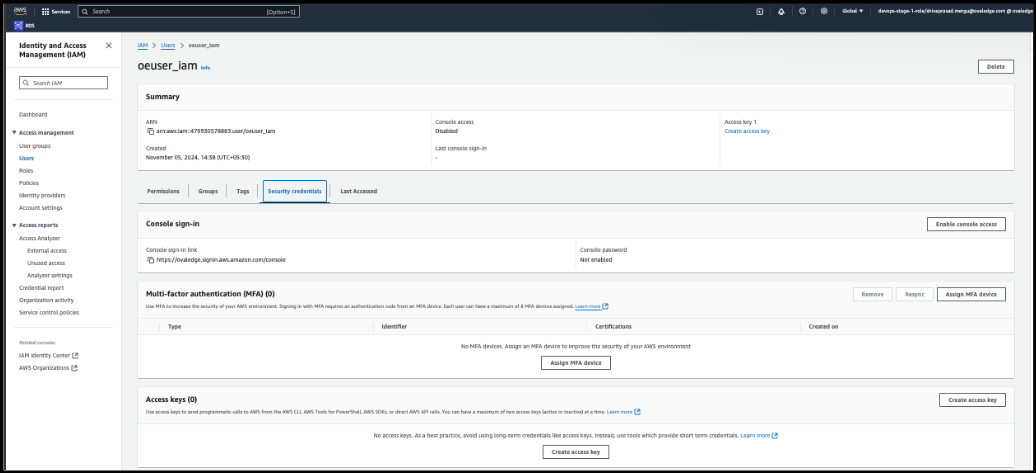
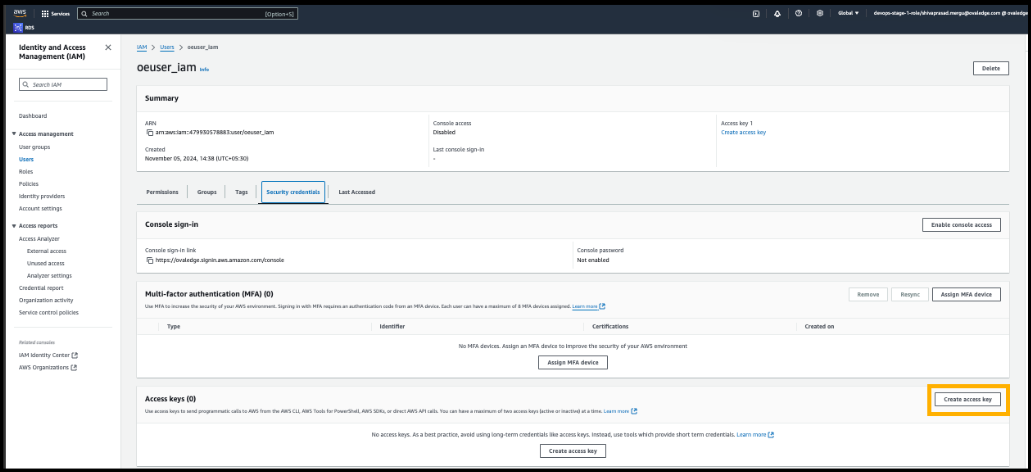
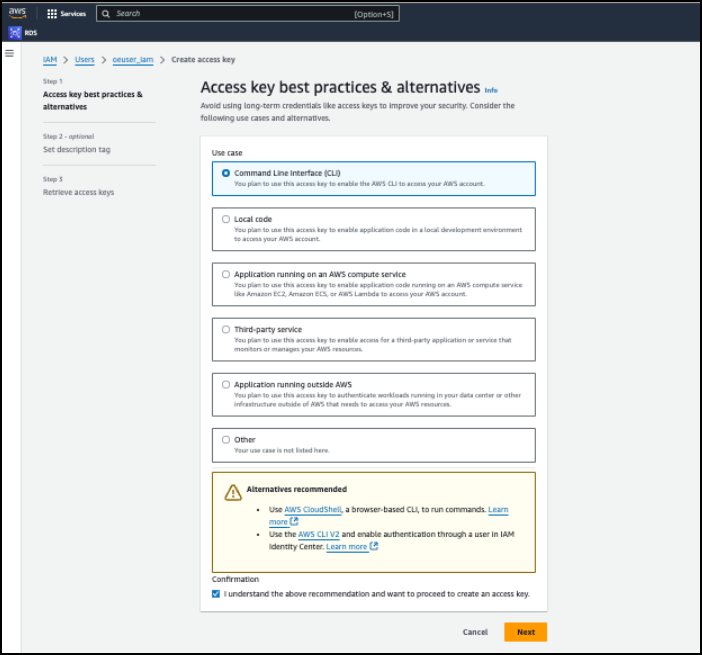
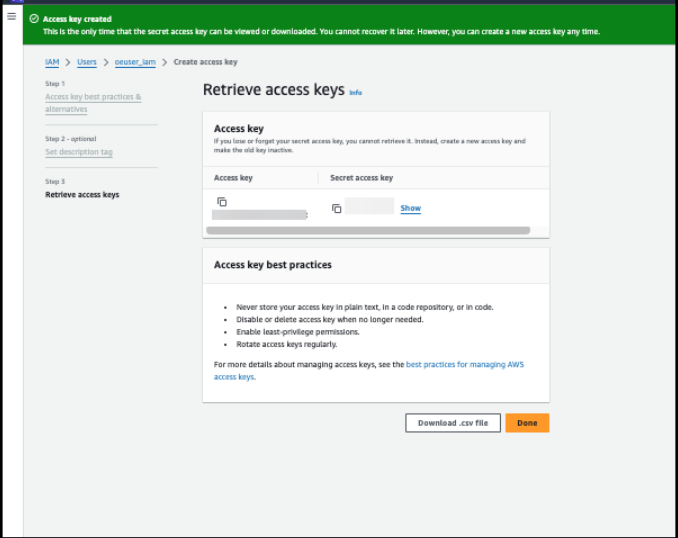
| Access key* | Enter Access Key. |
| Secret key* | Enter Secret Key. |
| Secrets Manager Region* | Enter Secrets Manager Region. |
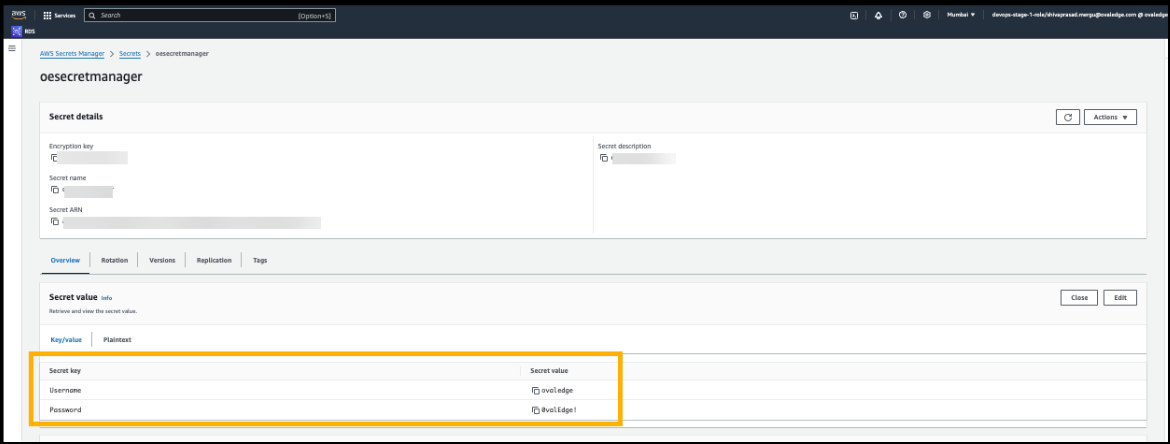
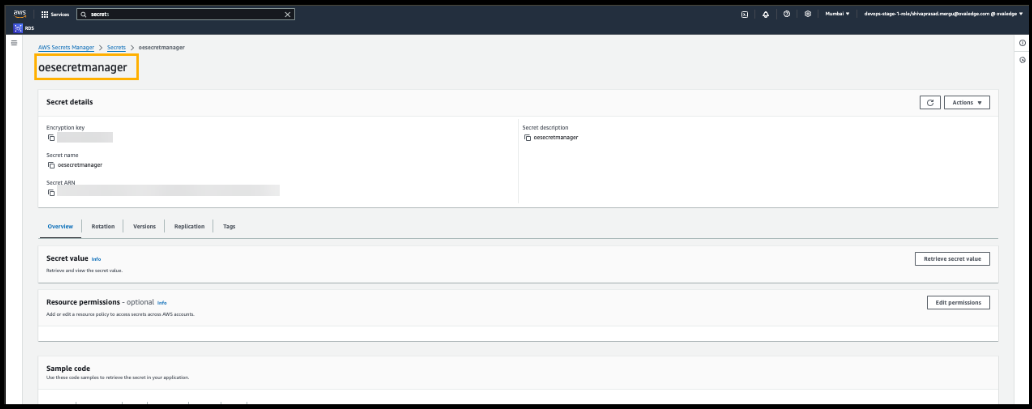
| Secret Name | Enter Secret Name. |
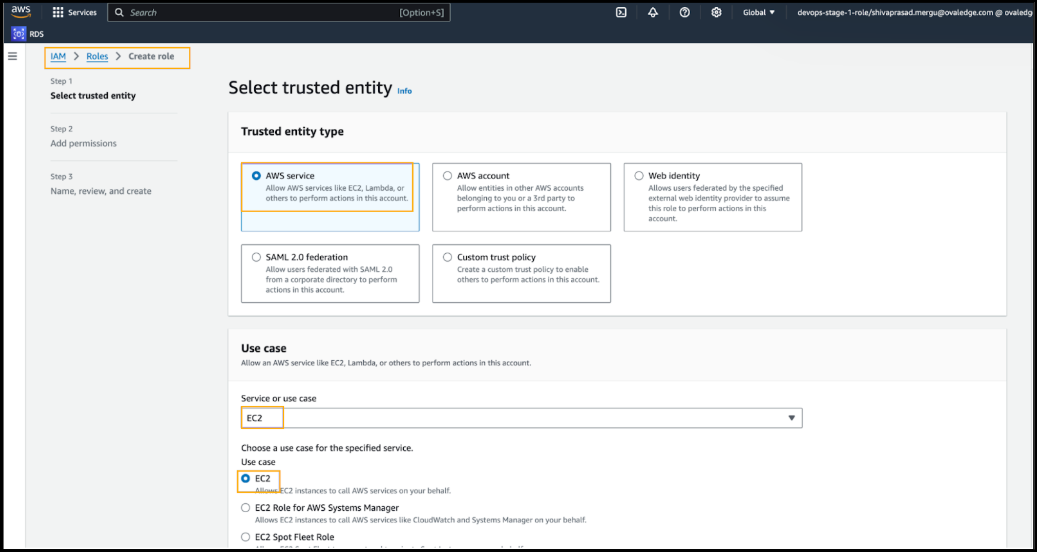
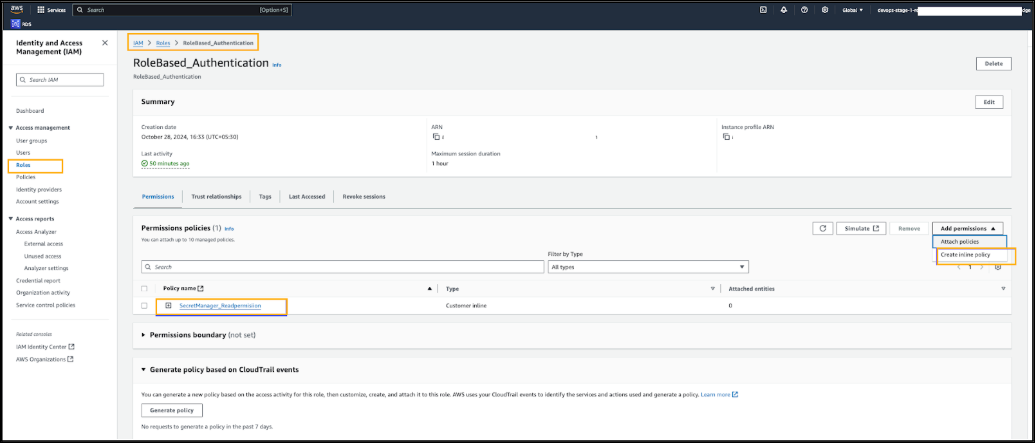
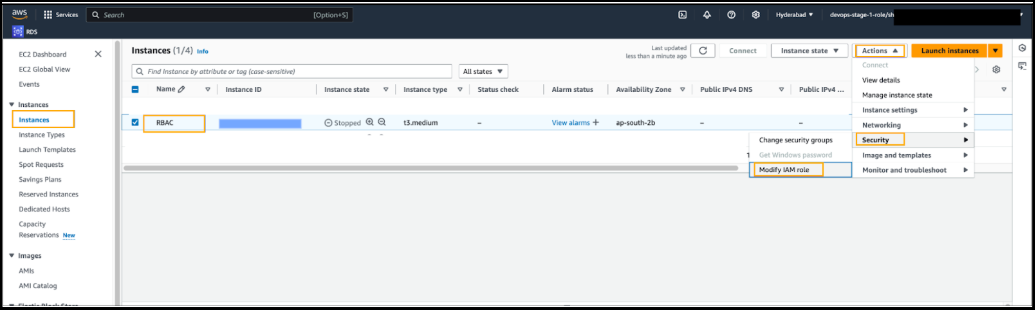
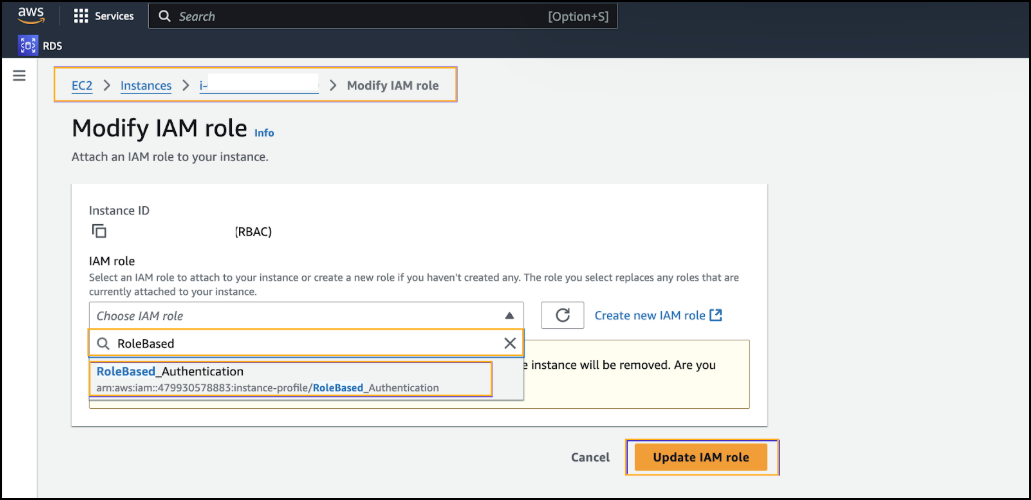
| Role Based Authentication | |
| License Add Ons | OvalEdge connectors have a default license add-on for data crawling and profiling. |
| Connector Name* | Enter a unique name for the AWS Secrets Manager connection (Example: "AWSSecrets_Prod"). |
| Connector Environment | Select the environment (Example: PROD, STG) configured for the connector. |
| Cross-Account Role ARN | Enter Cross-Account Role ARN. |
| Secrets Manager Region* | Enter Secrets Manager Region. |
| Secret Name | Enter Secret Name. |
| Default Governance Roles* | Select the appropriate users or teams for each governance role from the dropdown list. All users and teams configured in OvalEdge Security are displayed for selection. |
| Admin Roles* | Select one or more users from the dropdown list for Integration Admin and Security and Governance Admin. All users configured in OvalEdge Security are available for selection. |
| No Of Archive Objects* | It indicates the number of recent metadata changes to a dataset at the source. By default, it is off. You can enable it by toggling the Archive button and specifying the number of objects to archive. Example: Setting it to 4 retrieves the last four changes, shown in the 'version' column of the 'Metadata Changes' module. |
| Select Bridge* | The dropdown displays all the active and inactive bridges configured in the OvalEdge. Select the appropriate bridge that enables seamless connectivity between data sources without altering firewall rules. |
| Field Name | Description |
|---|---|
| Connector Type | By default, "Redshift" is displayed as the selected connector type. |
| Credential Manager* | Select AWS Secrets Manager from the drop-down list. |
| License Add Ons | OvalEdge connectors have a default license add-on for data crawling and profiling.
|
| Credential Manager Connector ID* | Enter the connector ID generated during the AWS Secrets Manager connector validation. Example: 1020 |
| Connector Name* | Enter a unique name for the Redshift connection Example: "Redshift_Prod" |
| Connector Environment | Select the environment (Example: PROD, STG) configured for the connector. |
| Server* | Enter the Server name. |
| Port* | Enter Port. |
| Database* | Enter the Database name. |
| Driver* | Driver details are shown by default. |
| Username* | Enter username. (These details are obtained from the Secret manager) Ex: <secret_name>/<Secret key> |
| Password* | Enter Password. |
| Connection String | Configure the connection string for the Redshift database:
jdbc:redshift://{server}:5439/{sid}
Replace placeholders with actual database details. {sid} refers to Database Name |
| Default Governance Roles* | Select the appropriate users or teams for each governance role from the dropdown list. All users and teams configured in OvalEdge Security are displayed for selection. |
| Admin Roles* | Select one or more users from the dropdown list for Integration Admin and Security and Governance Admin. All users configured in OvalEdge Security are available for selection. |
| No Of Archive Objects* | It indicates the number of recent metadata changes to a dataset at the source. By default, it is off. You can enable it by toggling the Archive button and specifying the number of objects to archive. Example: Setting it to 4 retrieves the last four changes, shown in the 'version' column of the 'Metadata Changes' module. |
| Select Bridge* | The dropdown displays all the active and inactive bridges configured in the OvalEdge. Select the appropriate bridge that enables seamless connectivity between data sources without altering firewall rules. |