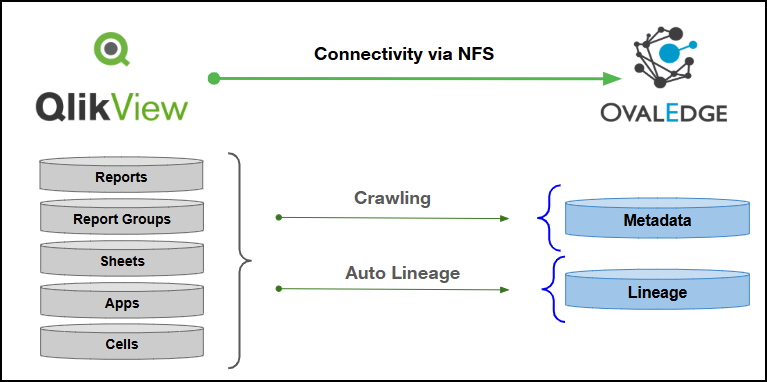
 ## Overview
### Connector Details
| Connector Category | Reporting Tools |
| ---------------------------------------------------------------------------- | ---------------------- |
| OvalEdge Release Supported | Release6.3.4 and later |
|
## Overview
### Connector Details
| Connector Category | Reporting Tools |
| ---------------------------------------------------------------------------- | ---------------------- |
| OvalEdge Release Supported | Release6.3.4 and later |
| Connectivity
\[How the connection is established with QlikView]
| NFS | | Verified QlikView Version | Version 12.100 | {% hint style="info" %} The QlikView connector validates with the listed “Verified QlikView Version” and supports other compatible QlikView versions. If there are any issues with validation or metadata crawling, please submit a support ticket for investigation and feedback. {% endhint %} ### Connector Features| Feature | Availability |
|---|---|
| Crawling | ✅ |
| Profiling | NA |
| Query Sheet | NA |
| Report Preview | ❌ |
| Auto Lineage | ✅ To learn more, click here. |
| Manual Lineage | ✅ |
| Secure Authentication via Credential Manager | ✅ |
| Data Quality | NA |
| DAM (Data Access Management) | NA |
| Bridge | ✅ |
| QlikView Object | QlikView Attribute | OvalEdge Attribute | OvalEdge Category | OvalEdge Type |
|---|---|---|---|---|
| Streams | Stream | Report Group | Report Group | Domain |
| Apps | App | Report Group | ReportGroup | Domain |
| Apps | App | Report | Report | Presentation Layer |
| Apps | App Description | Source Description | Description | - |
| Sheet | Sheet | Report | Report | Sheet |
| Sheet | Sheet description | Source Description | Description | - |
| Cells | Cell | Report | Report | Cell Type |
| Cells | Cell Description | Source Description | Description | - |
| Measures | Measure | Report Field | Report Field | Measure |
| Measures | Measure Name | Name | Report Field | Measure |
| Measures | Measure formula | Formula | Report Field | Measure |
| Measures | Measure Description | Description | Report Field | Measure |
| Dimensions | Dimension | Report Field | Report Field | Dimension |
| Dimensions | Dimension Name | Name | Report Field | Dimension |
| Dimensions | Dimension Formula | Formula | Report Field | Dimension |
| Dimensions | Dimension description | Description | Report Field | Dimension |
| Master Objects | Master Object | Report Field | Report Field | Master Object |
| Master Objects | Master Object Name | Name | Report Field | Master Object |
| Master Objects | Master Object Formula | Formula | Report Field | Master Object |
| Master Objects | Master Object Description | Description | Report Field | Master Object |
| Variables | Variable | Report Field | Report Field | Variable |
| Variables | Variable Name | Name | Report Field | Variable |
| Variables | Variable Value | Formula | Report Field | Variable |
| Source Code | Script Info | Source Code | Source Code | Script |
| Source Code | Script Content | Code | Source Code | Script |
| Source Code | Script Name | Source Code Name | Source Code | Script |
| Field Name | Description |
|---|---|
| Connector Type | By default, "QlikView" is displayed as the selected connector type. |
| Credential Manager* | Select the desired credentials manager from the drop-down list. Relevant parameters will be displayed based on the selection. Supported Credential Managers:
For more details, click here. |
| License Add-On |
For more details, click here. |
| Auto Lineage | Supported |
| Data Quality | Not Supported |
| Data Access | Not Supported |
| Connector Name* | Enter a unique name for the QlikView connection (Example: "QlikView_Prod"). |
| Connector Description | Enter the description related to the connector. |
| Connector Environment | Select the environment (Example: PROD, STG) configured for the connector. For more details, click here. |
| Source Documents Path* | Enter the path to the source document file where the QVS and QVW files are located. |
| Logs Path | Enter the path to the QlikView logs folder. |
| Default Governance Roles* | Select the appropriate users or teams for each governance role from the drop-down list. All users and teams configured in OvalEdge Security are displayed for selection. |
| Admin Roles* | Select one or more users from the dropdown list for Integration Admin and Security & Governance Admin. All users configured in OvalEdge Security are available for selection. |
| No Of Archive Objects* | This shows the number of recent metadata changes to a dataset at the source. By default, it is off. To enable it, toggle the Archive button and specify the number of objects to archive. Example: Setting it to 4 retrieves the last four changes, displayed in the 'Version' column of the 'Metadata Changes' module. |
| Select Bridge* | If applicable, select the bridge from the drop-down list. The drop-down list displays all active bridges configured in OvalEdge. These bridges enable communication between data sources and OvalEdge without altering firewall rules. |